.png)
Email Courier: How to create a blank HTML email template
With our HTML email editor, you have full control over your responsive email design. All you need to do is just drag and drop! The HTML email editor lets you customize every aspect of the email, from the layout to the content and images. You can use images, merge tags, and other elements to customize your email and preview it before sending. Once the email is designed, you can send it out to your attendees through Email Courier.
In this article, you will learn how to create blank HTML templates based on the email type on Sense:
- Invitation Email
- Recommendation Email
- Structured Meetings Schedule Email
Unstructured Meetings Update Email
Overview
After selecting the blank template based on the email type (Invitation, Recommendation, Structured Meetings Schedule, Unstructured Meetings Update) you would like to create, you will access the email editor. The editor is divided into two sections, Content and Body.
Content is what you will use to build your email with the various tools available on the editor, such as Columns, Button, Divider, Heading, Text, Image, Menu and HTML.
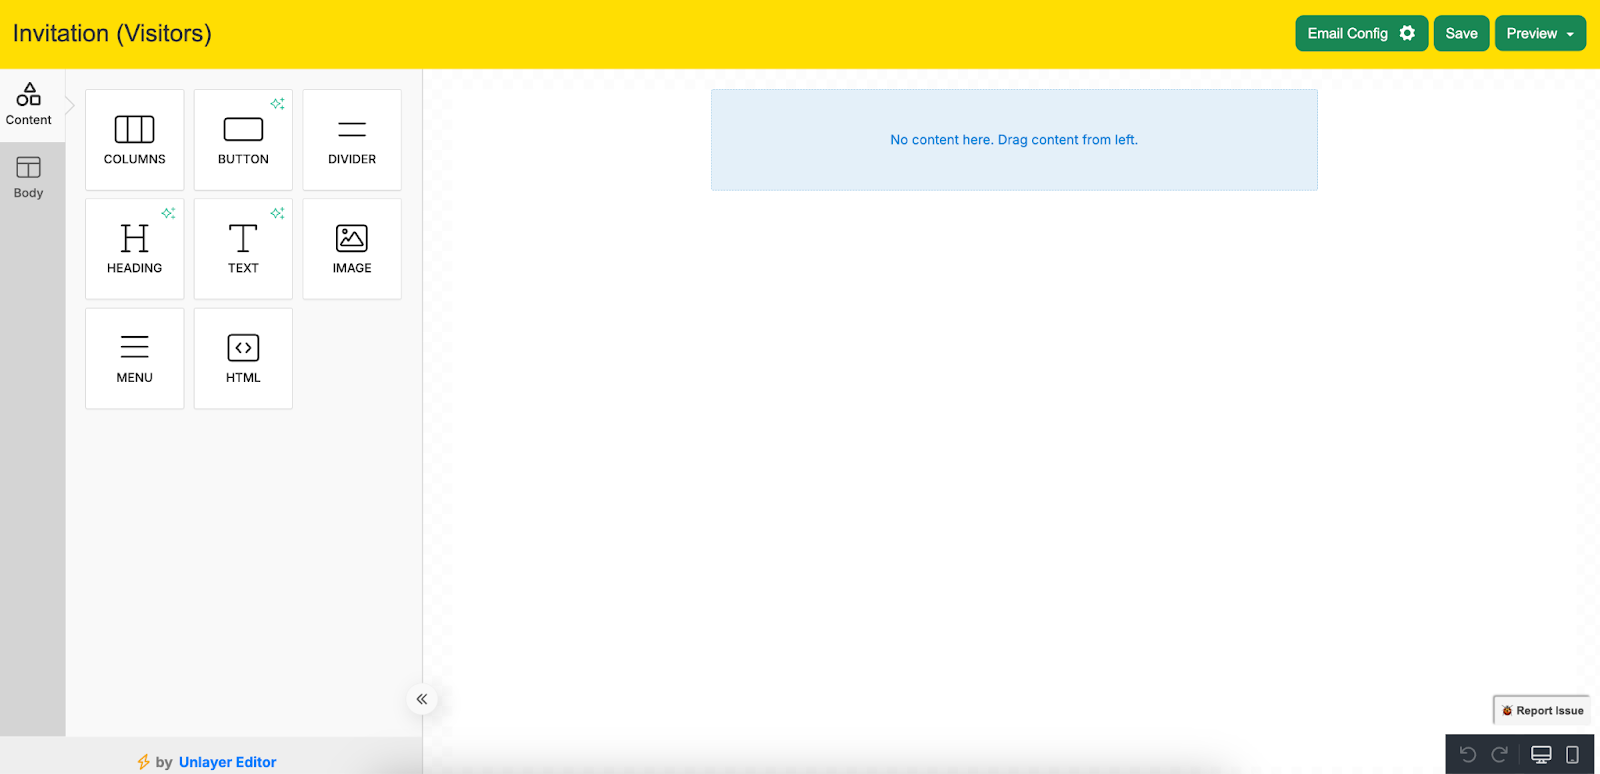
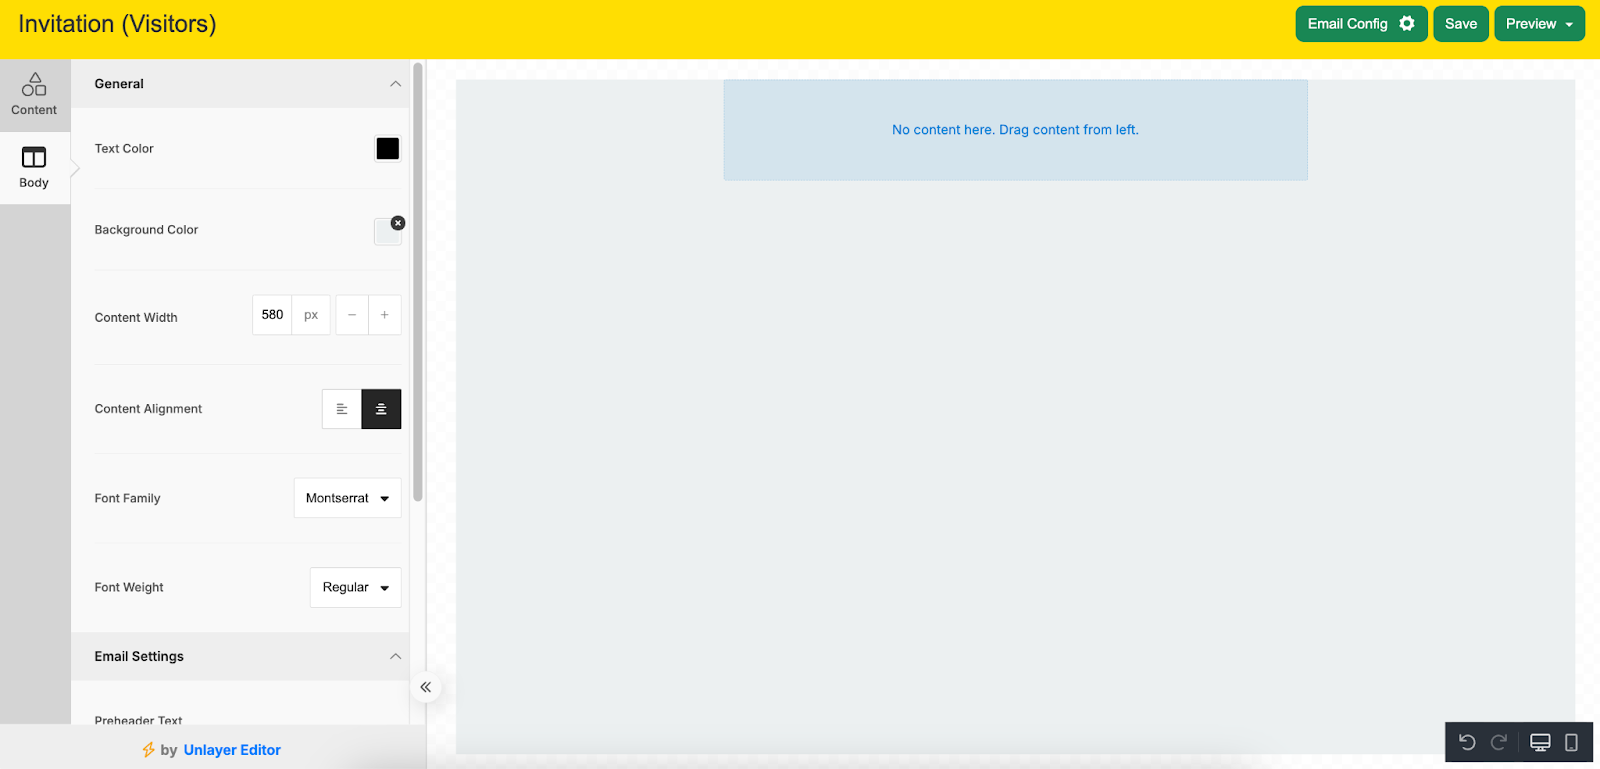
Body provides the options to edit general settings within the content.
Tools for Designing Your Email
The editor comes with the following tools that you can drag and drop into your email design:
- Columns: It allows you to add columns to your design in order to have a better design arrangement.
- Button: Add any type of button in your email. You can change colors and styles.
- Divider: Add appropriate spacing at any point you want in your design.
- Heading: Add headings (from level 1-6) to the design.
- Text: Text is a built-in tool for you to add text to your design.
- Image: To make your emails attractive, you can add images using this tool.
- Menu: Menu is a built-in tool used to create navigation menus.
- HTML : This tool will give you flexibility to add custom HTML to the design.
How to Design Your Email Using a Blank Template
Invitation Email
Step 1: Decide on a Layout
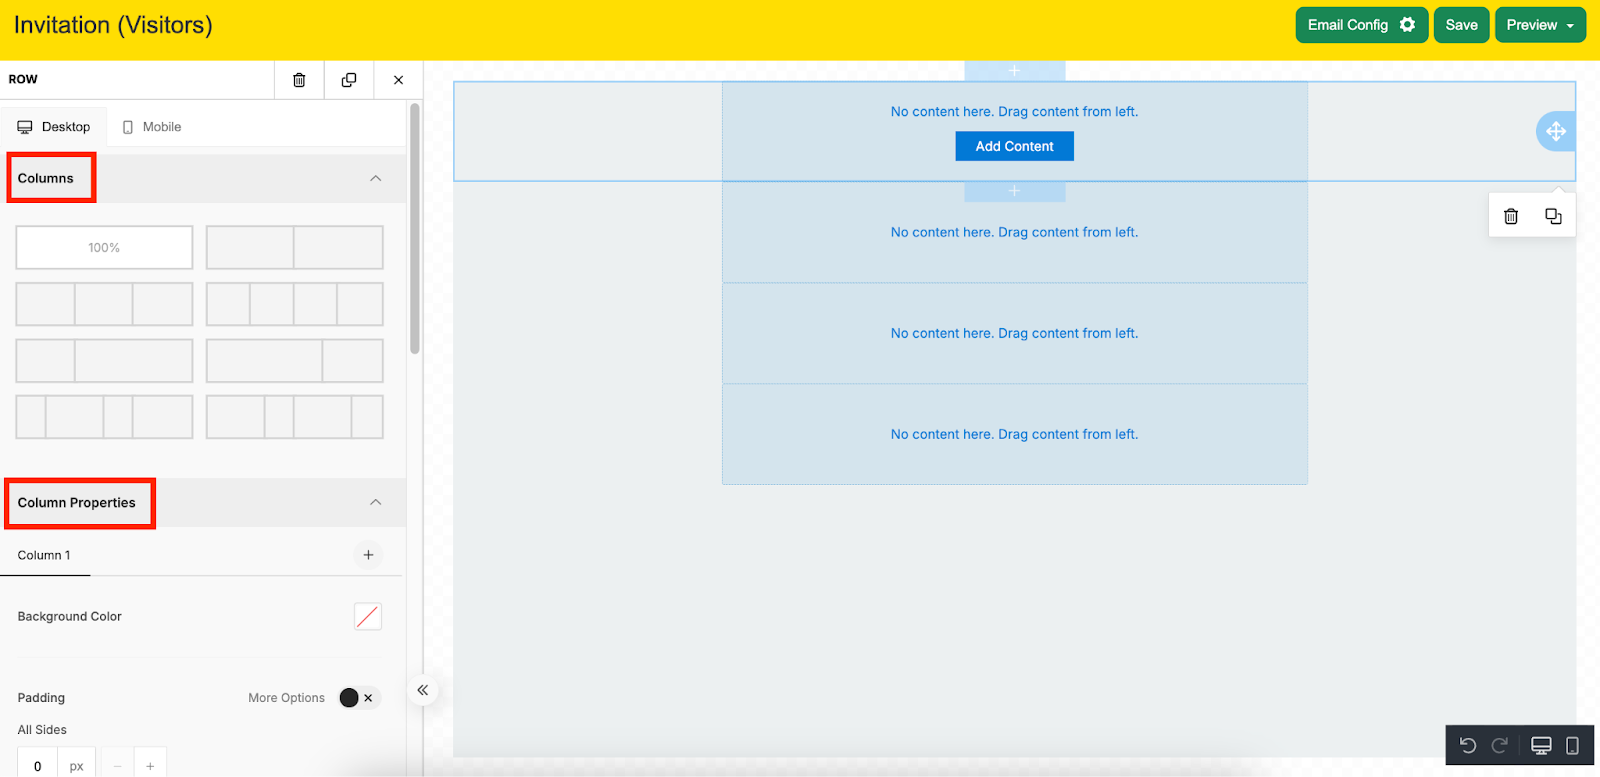
Single column layout like the Jublia Template is the simplest and most common email layout. It focuses on keeping both text and images justified and of similar width to ensure easy digestibility and engagement.
Break up your email design into sections by adding rows to the template. You can do this by dragging the Column tool to the template. Click on the + icon above or below each row to create more sections/rows.

Edit row and column properties by clicking on the specific row, and editing the available options on the side panel.

Step 2: Add Features to the Template
Drag the different tools that you want to add to your template from the side panel to each section. Here are some examples of how the features work:
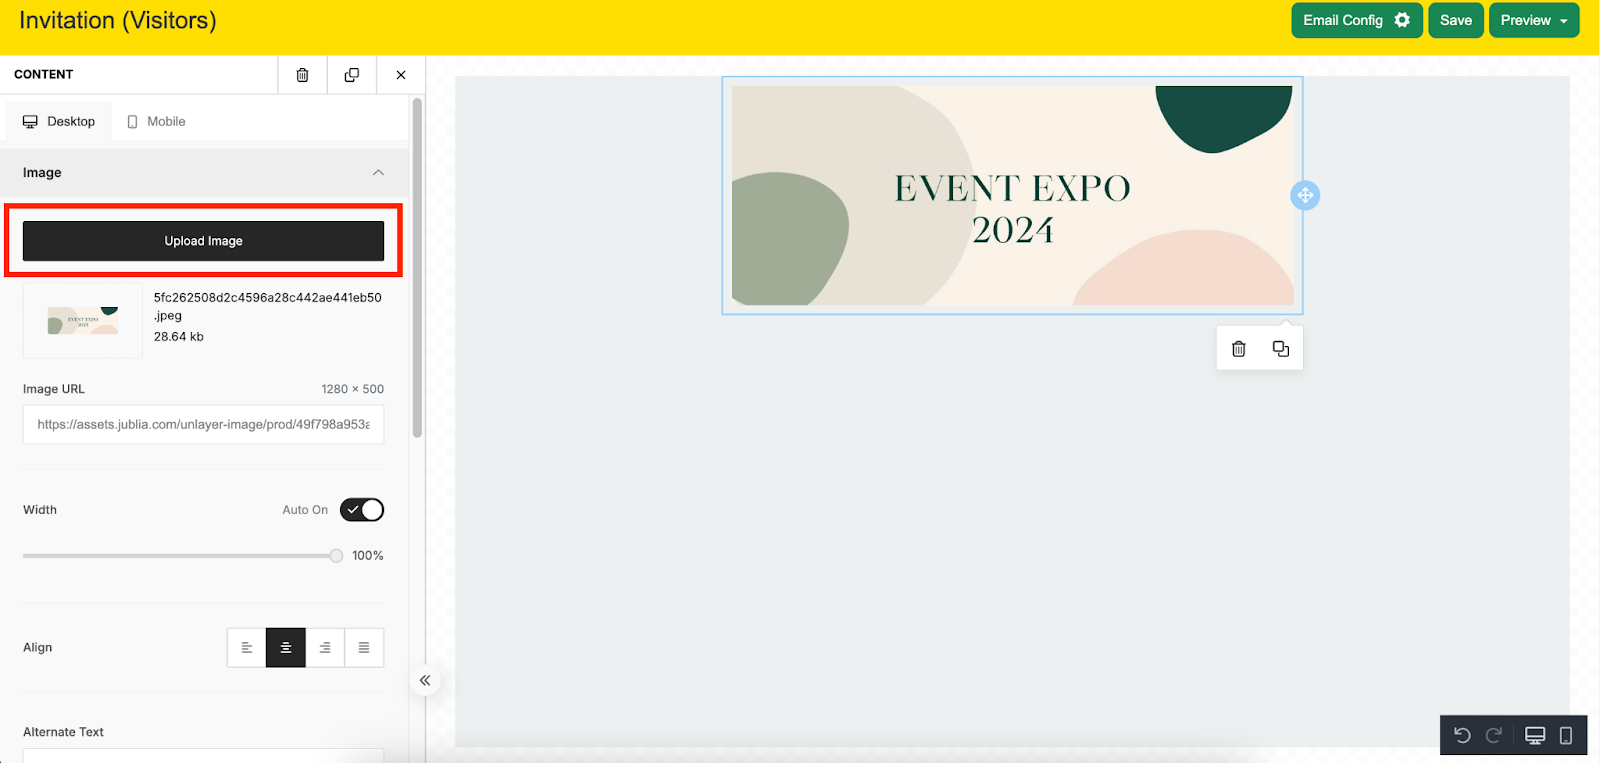
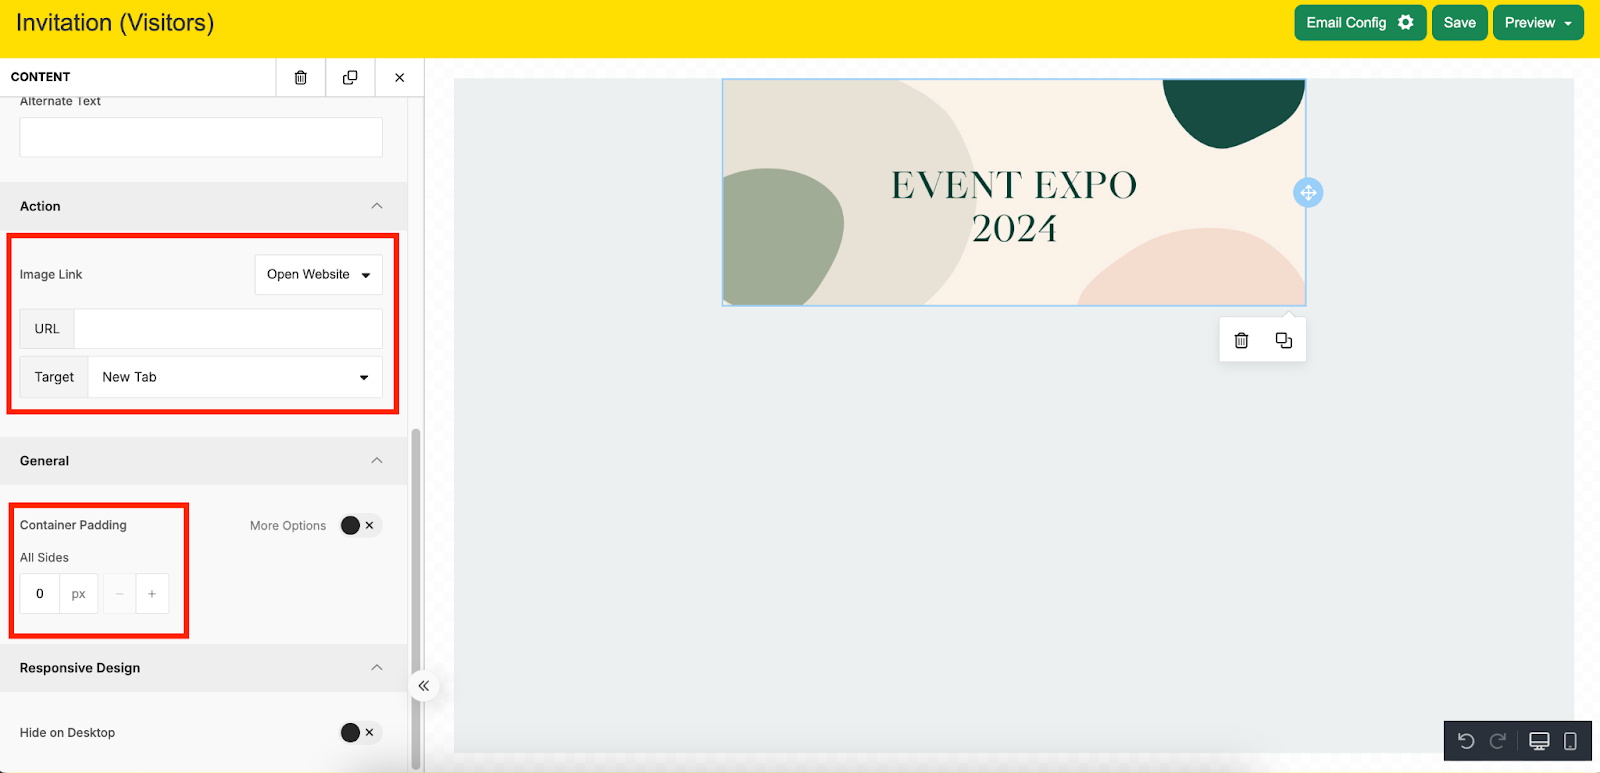
Add Image
- Drag the Image tool to the template to add an image at the top of the email. Upload an image such as a banner. Adjust container padding to 0.
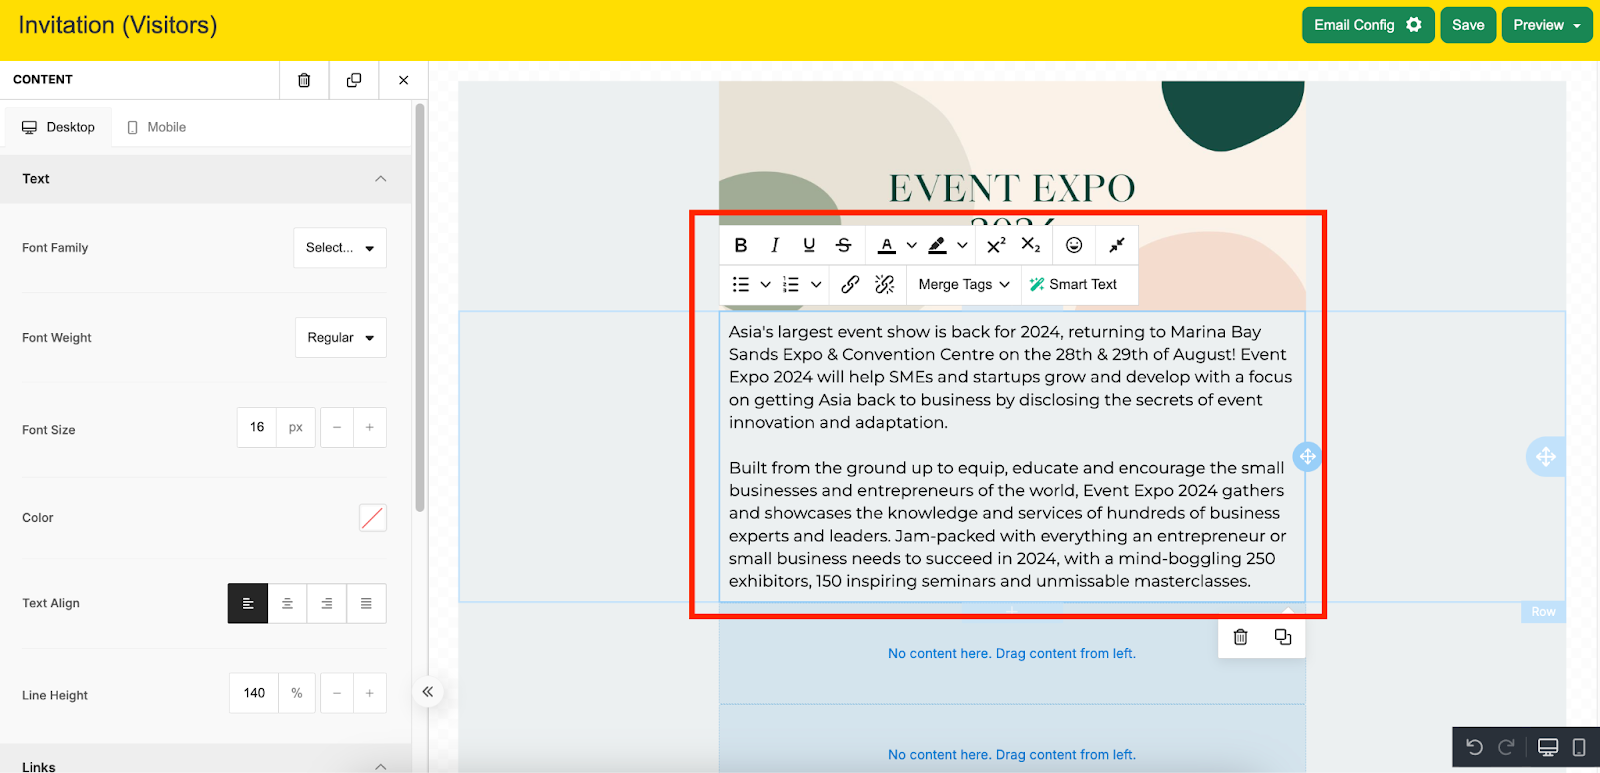
Add Text
- Drag Text to the next row, to add your desired text and event information within the row.
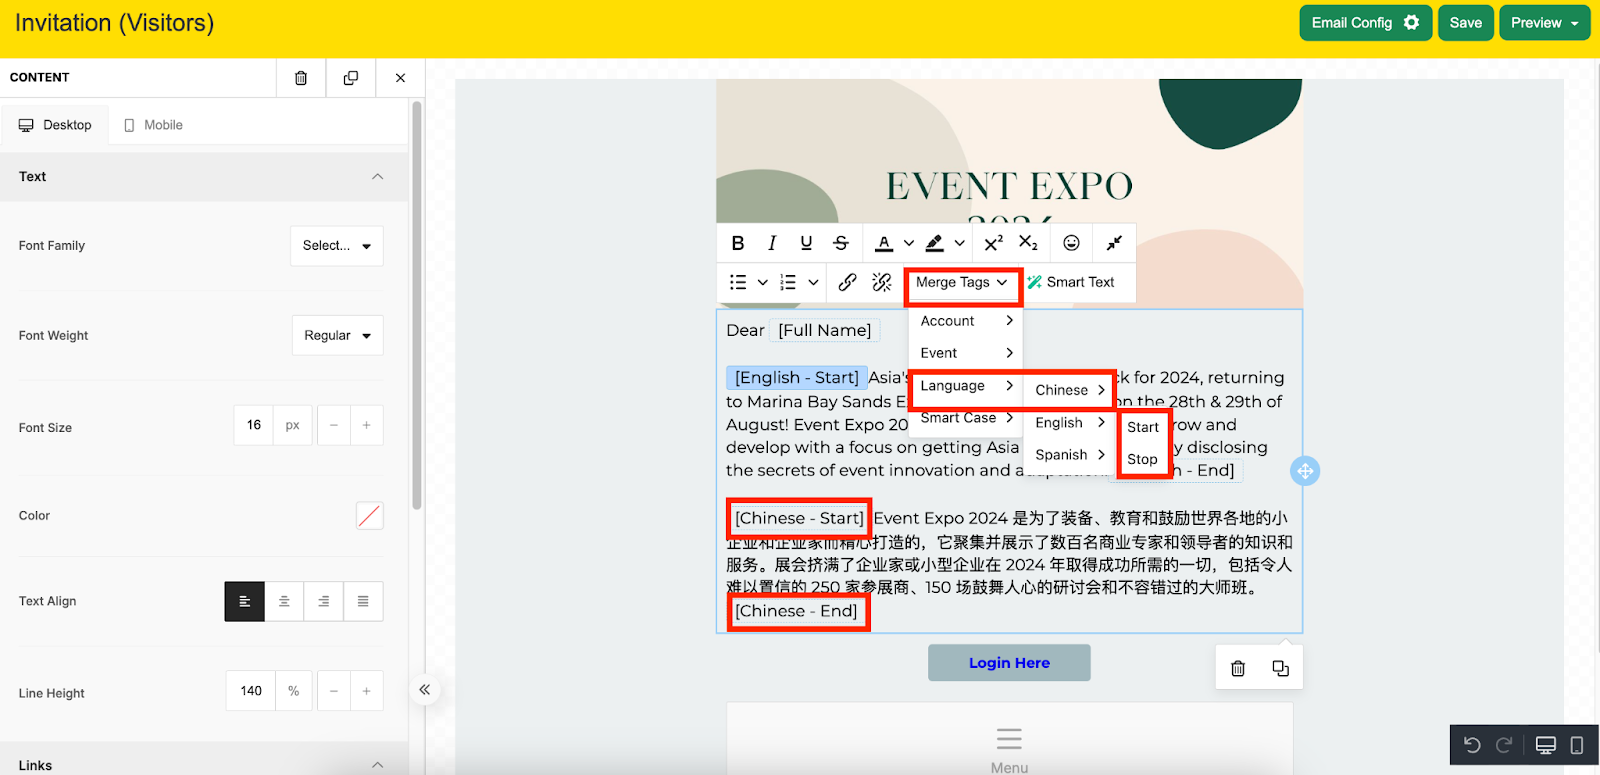
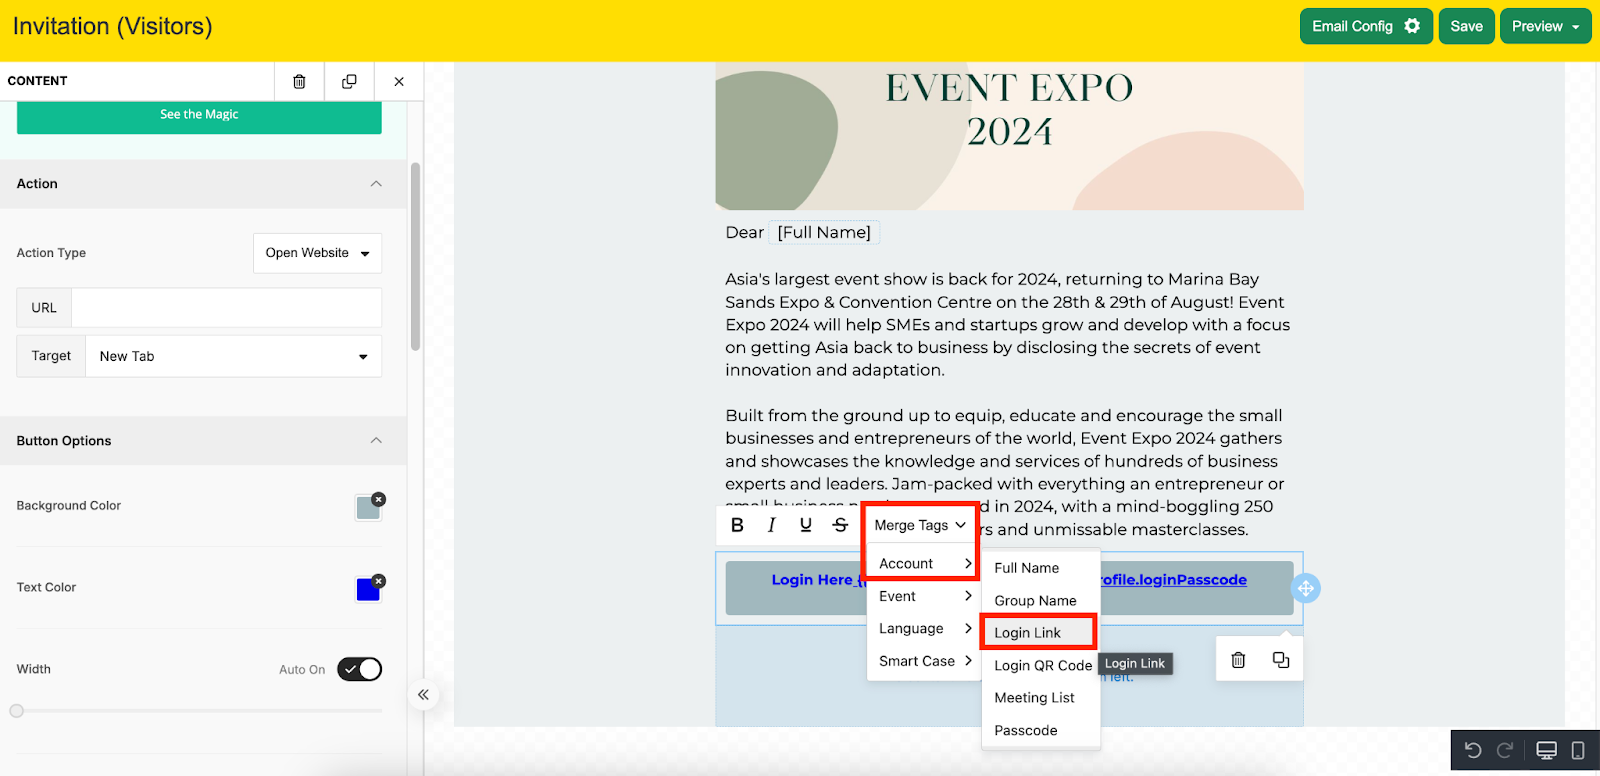
Merge Tags allow you to dynamically add content to your email. It pulls information that is unique to your event such as addressing the attendee by their full name, direct access links, passcodes, language selection, app download links and more. Merge tags can be inserted into a block of text by clicking on the Merge Tags button in the text editor toolbar. Use the different merge tags available on the toolbar for the different email types that you create.

If your event has multiple languages, you can upload the text content in multiple languages within a single template by using the Language merge tag at the start and end of the translated text.
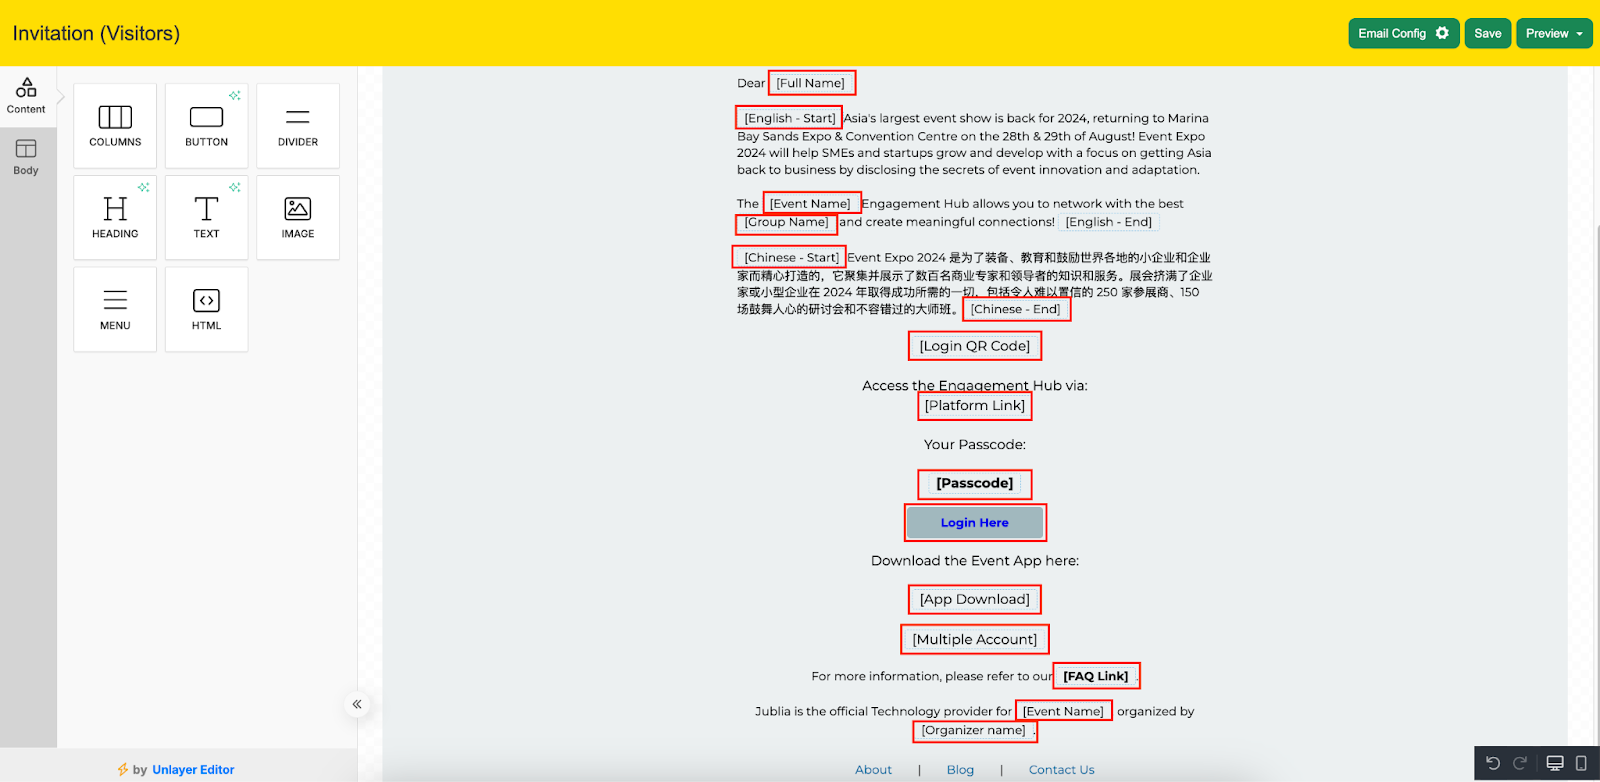
For Invitation emails, these are the merge tags that can be added:
- Account > Full Name
- Account > Group Name
- Account > Login Link
- Account > Login QR code
- Account > Passcode
- Event > App Link Android (if event has Native App)
- Event > App Link iOS (if event has Native App)
- Event > Concierge Name
- Event > Event Name
- Event > FAQ Link
- Event > Organizer Name
- Event > Platform Link
- Language > Event Languages
- Smart Case > App Download (if event has Native App)
Smart Case > Multiple Accounts (include this merge tag to show the prompt when the system detects that the user has multiple accounts upon receipt of the Invitation email)
Add Button
- Drag Button to the next row. Buttons can link out to an external site by adding a URL under Action Type or to a feature within the platform by adding a Merge Tag. Edit the button text as well as the button options on the left panel. As a best practice, under Spacing on the left panel, adjust the left and right padding for the button to 40px.
- As an example, we will add the Login Link merge tag to a button. The dynamic code {{ }} will appear next to the button text.
- Cut the dynamic code and paste it into the URL field on the left panel. Remove the dynamic code next to the button text.
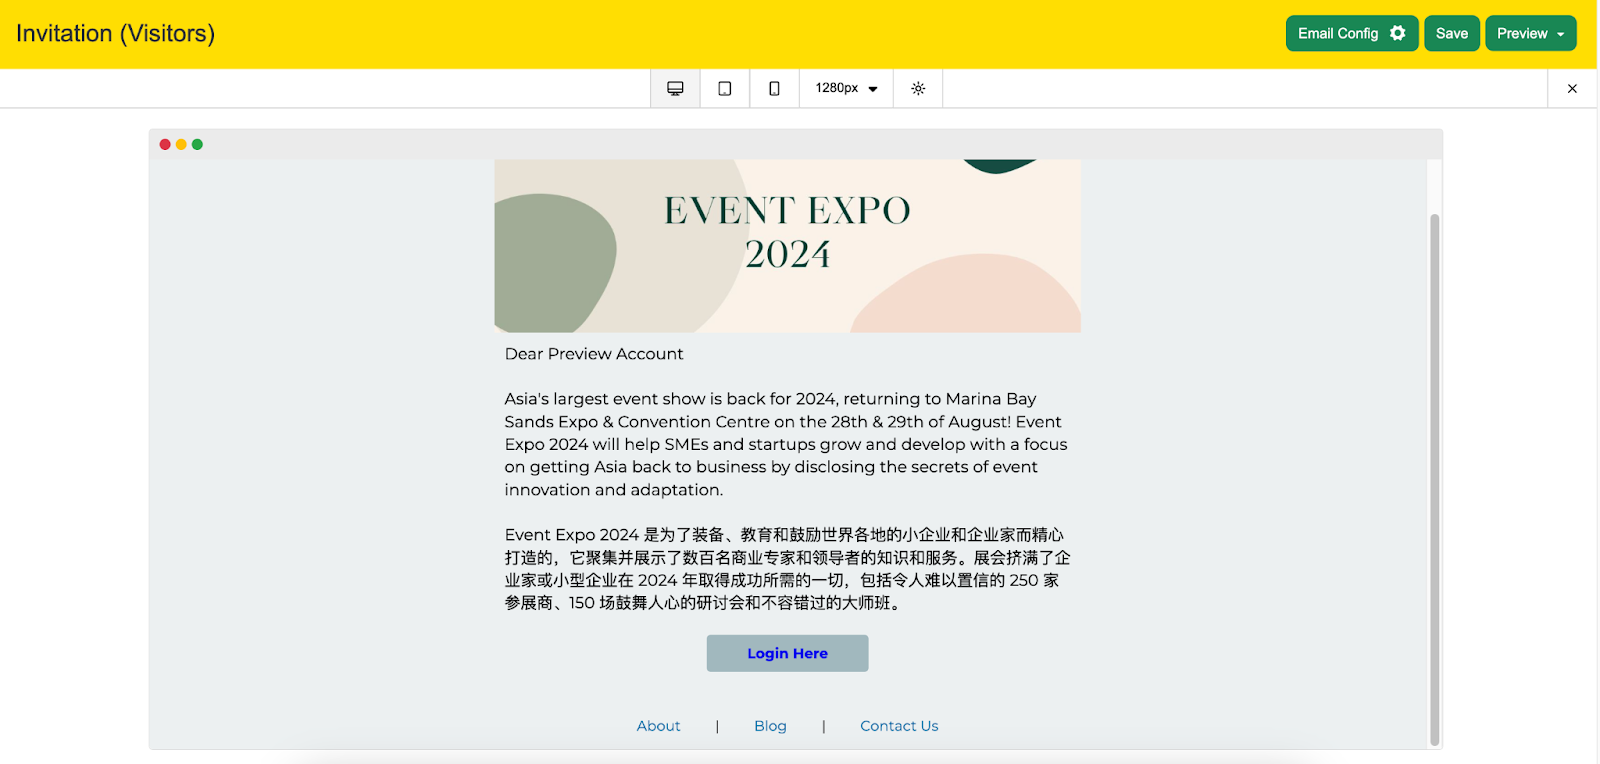
Click on Preview at the top right corner, to preview any edits made to the template or to test out the links/buttons.

*Kindly ignore the Please enter a URL prompt
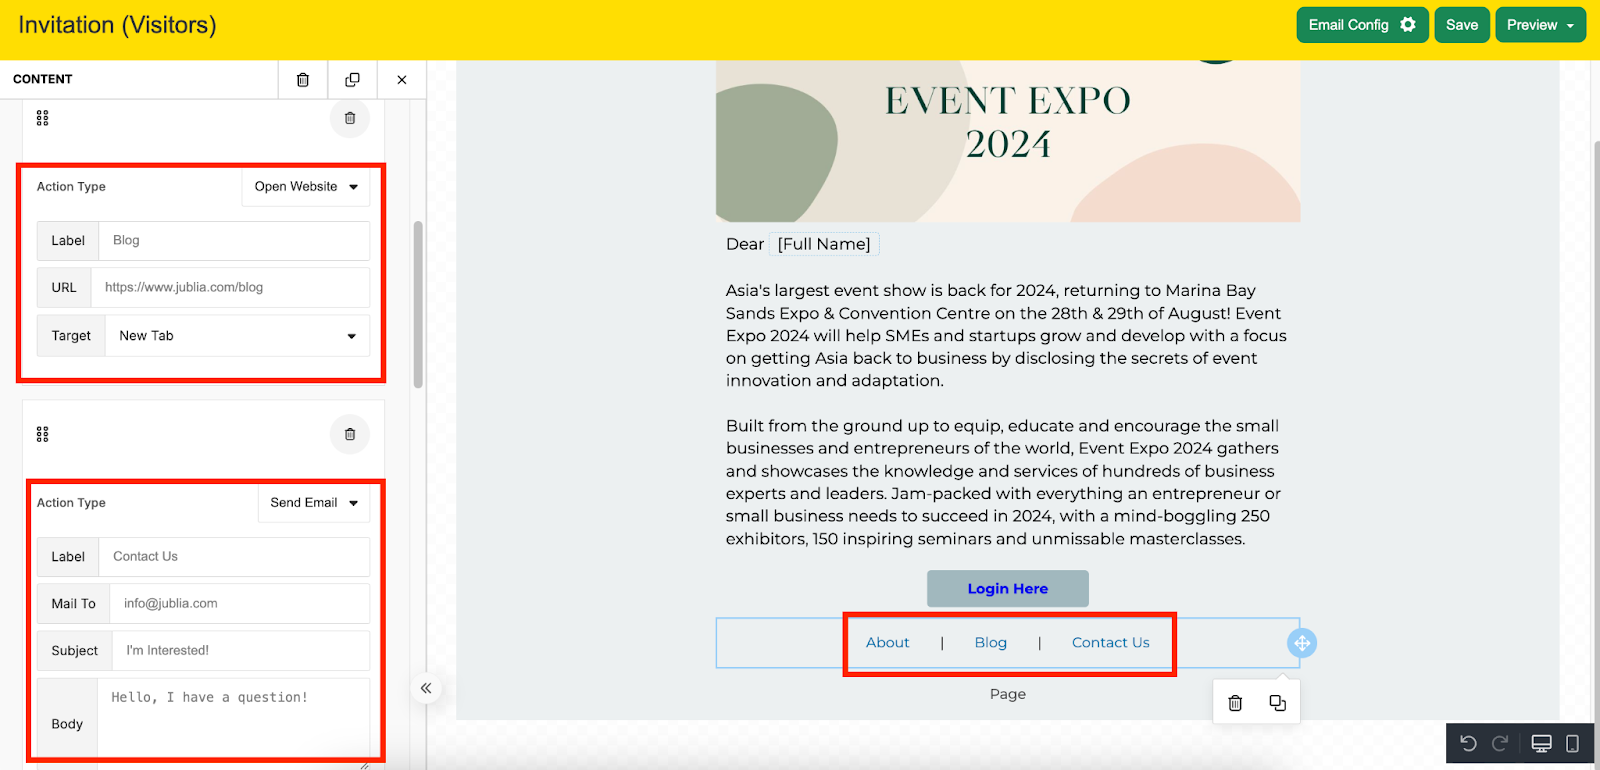
Add Menu
Create navigation menus by dragging the Menu tool into the template. Click on Add New Item on the left panel to add a navigation menu.
Edit the information on the left panel of each navigation menu you add.

Step 3: Email Config, Save and Preview
- Email Config allows you to edit your template name and subject of the email
- Click on Preview at any time of editing the template, and to have a final look before saving. If your event has multiple languages, you may preview all languages at once or select the language you would like to view it in.
Once you are satisfied with the email design and template that you have created, click on Save.
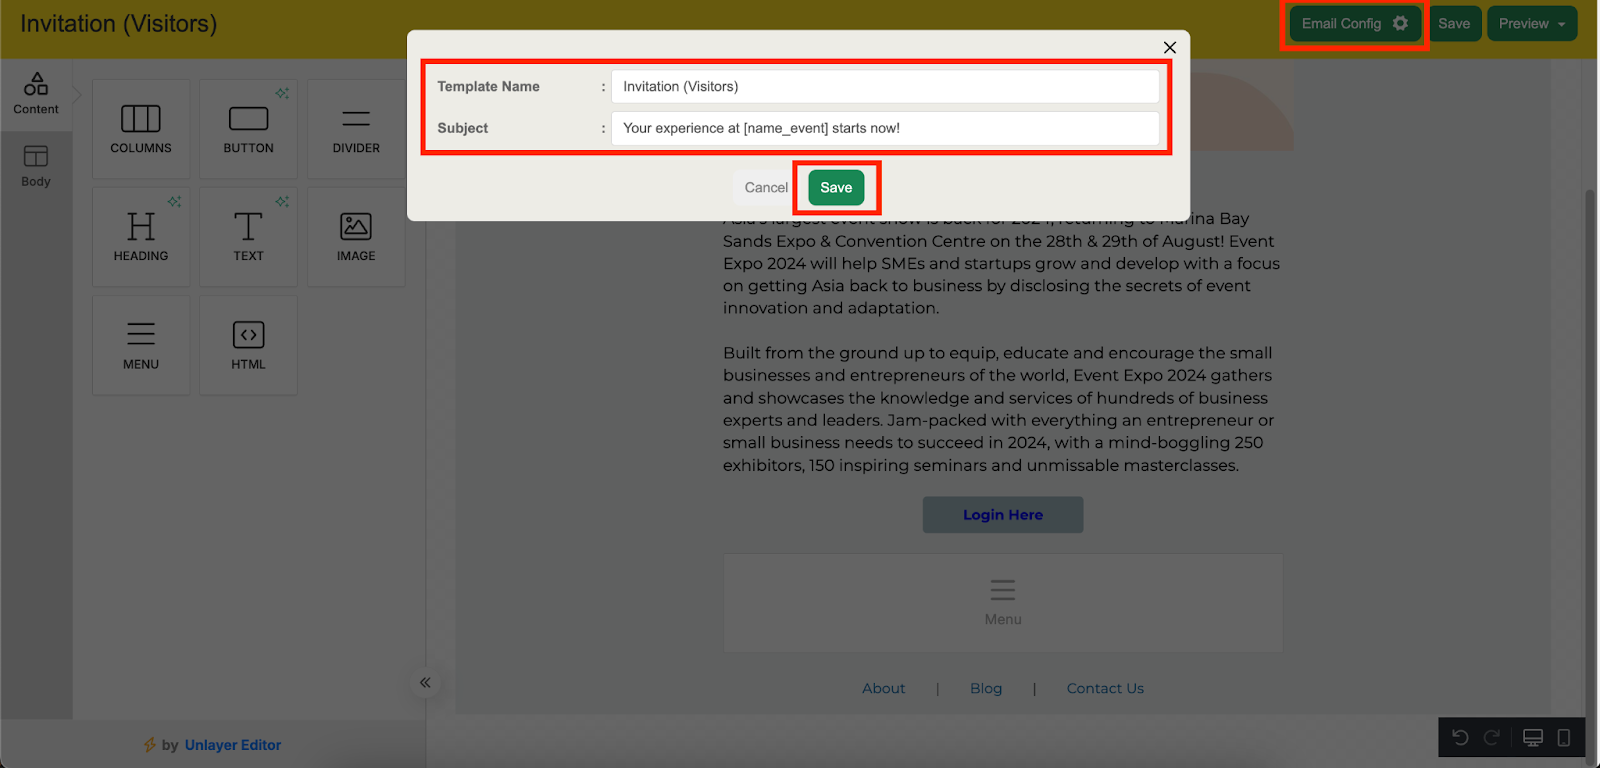
*Important: Always remember to click on Save once you confirm any changes to your template.
Best Practices
- After previewing and before sending out the actual email, always remember to first test the full functionality of the email by sending a Single (testing only) email to yourself via Campaign
- To send out your new email template to the intended group(s), follow the instructions on this guide: Email Courier: How to send out HTML emails through Campaign (add link to article 2)
- For events with Native App: If you are launching the Native App after the Web App, remember to update your Invitation email template to include the app download links once the Native App is live and published in the app stores (see: Jublia Template - Native App Invitation Email)
Recommendation Email
Follow the same steps as per Invitation email to create a new template for the Recommendation email. The aim of the recommendation email is to suggest relevant attendees profiles to a user using our AI-powered recommendations that adapt to each user’s interests and activities on the platform.
For Recommendation emails, these are the merge tags that can be added:
- Account > Recommendation List
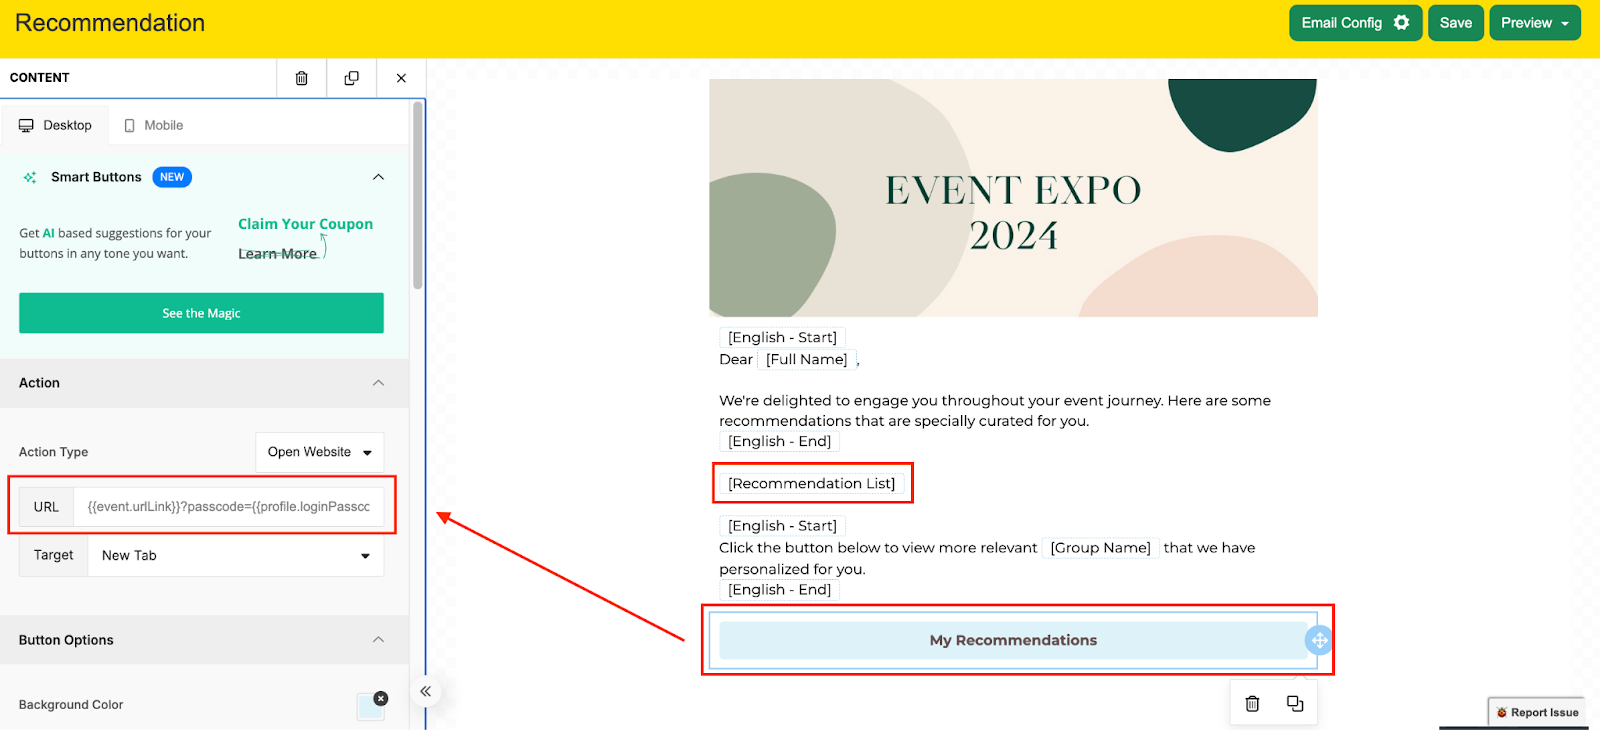
- You may also link out to the full list of recommendations by adding the login link merge tag as a button.
- Add the Login Link merge tag to a button. The dynamic code {{ }} will appear next to the button text.
- Cut the dynamic code and paste it into the URL field on the left panel. Remove the dynamic code next to the button text.
*Kindly ignore the Please enter a URL prompt should it appear.
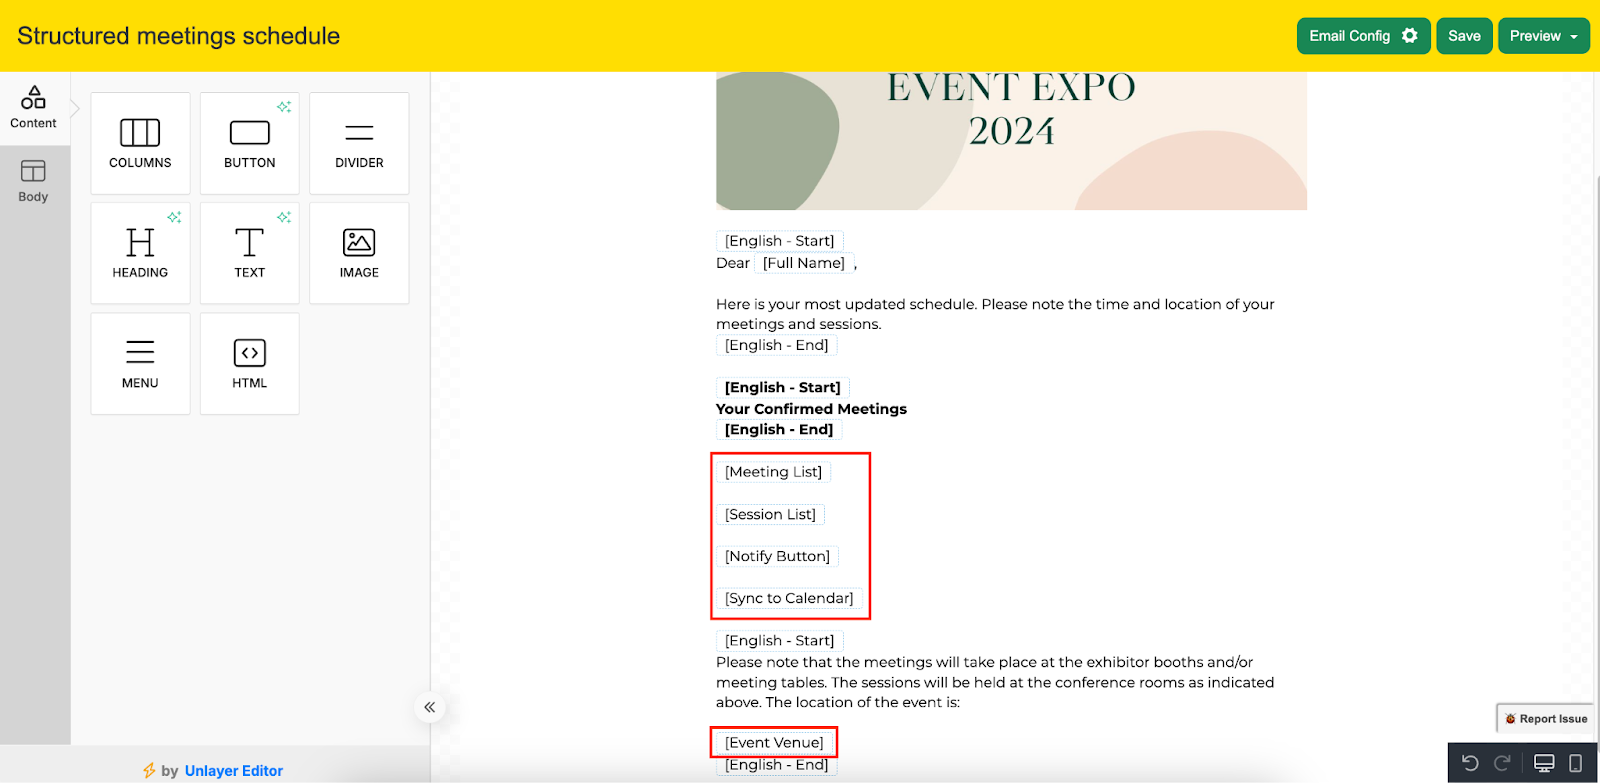
Structured Meetings Schedule Email
Follow the same steps as per Invitation email to create a new template for the Structured Meetings Schedule email. This email provides the information for confirmed virtual and/or onsite meetings during the event days, and is typically sent a week before and the day before and during each event day.
For Structured meetings schedule emails, these are the email type specific merge tags that can be added:
- Account > Meeting List
- Account > Session List
- Event > Event Venue
- Smart Case > Notify Button
- Smart Case > Sync to Calendar
Unstructured Meetings Update
Follow the same steps as per Invitation email to create a new template for the Unstructured Meetings Update email. This email shows the collated chat conversations on a weekly basis.
For unstructured meetings update emails, these are the merge tags that can be added:
- Account > Chat Contacts

- You may also link out to the full list of chats by adding a button and enter into the URL field on the left panel: {{ chat_link.first }}
*Kindly ignore the Please enter a URL prompt should it appear.