.png)
Email Courier: How to edit the default HTML Jublia template
With our HTML email editor, you have full control over your responsive email design by editing your email. In case you don't want to create a template from scratch, you can always use or update our default Jublia email templates. The HTML email editor lets you customize every aspect of the email, from the layout to the content and images. You can use images, merge tags, and other elements to customize your email and preview it before sending. Once the email is designed, you can send it out to your attendees through Email Courier.
In this article, you will learn how to edit the various default HTML Jublia templates:
- Web App Invitation Email
- Native App Invitation Email
- Combined Web and Native App Invitation Email
- Recommendation Email
- Structured Meetings Schedule Email
- Unstructured Meetings Update Email
Overview
We will use the Invitation email template for illustration purposes. Depending on your event type and the Jublia solutions you have opted for, your invitation email may contain:
- Login details to the Web App only
- Login details and instructions for downloading the Native App
- Combination of access to the Web and Native App
The default template can be edited using our HTML email editor that comes with the following tools which you can drag and drop into your email design:
- Columns: It allows you to add columns to your design in order to have a better design arrangement.
- Button: Add any type of button in your email. You can change colors and styles.
- Divider: Add appropriate spacing at any point you want in your design.
- Heading: Add headings (from level 1-6) to the design.
- Text: Text is a built-in tool for you to add text to your design.
- Image: To make your emails attractive, you can add images using this tool.
- Menu: Menu is a built-in tool used to create navigation menus.
- HTML : This tool will give you flexibility to add custom HTML to the design.
Jublia Template - Web App Invitation Email
Step 1: Create a New Jublia Template
- Under Email Type, select Invitation.
- Select Jublia Template, add Template Name and click on Create. Your template will be stored in the panel on the right under Stored Templates.

Step 2: Edit the Selected Template
Once you have created the new template and hit the edit button, you will be redirected to a new tab where you can start editing the default template and make the changes you think are necessary.


- On the Jublia Template, you will be able to view preset links that allow a user to directly access the platform, together with the user passcode.
- You can edit the banner image, buttons, text and the arrangement of how the various features are displayed on the email. Click on each section that you would like to edit and find the row options on the left panel.
- If your event has multiple languages, you can upload the text content in multiple languages within a single template by using the Language merge tag at the start and end of the translated text.
- Smart Text can be found in the toolbar next to Merge Tags, and is a nifty AI tool with various functions that can help improve your text content.

Editing a Button
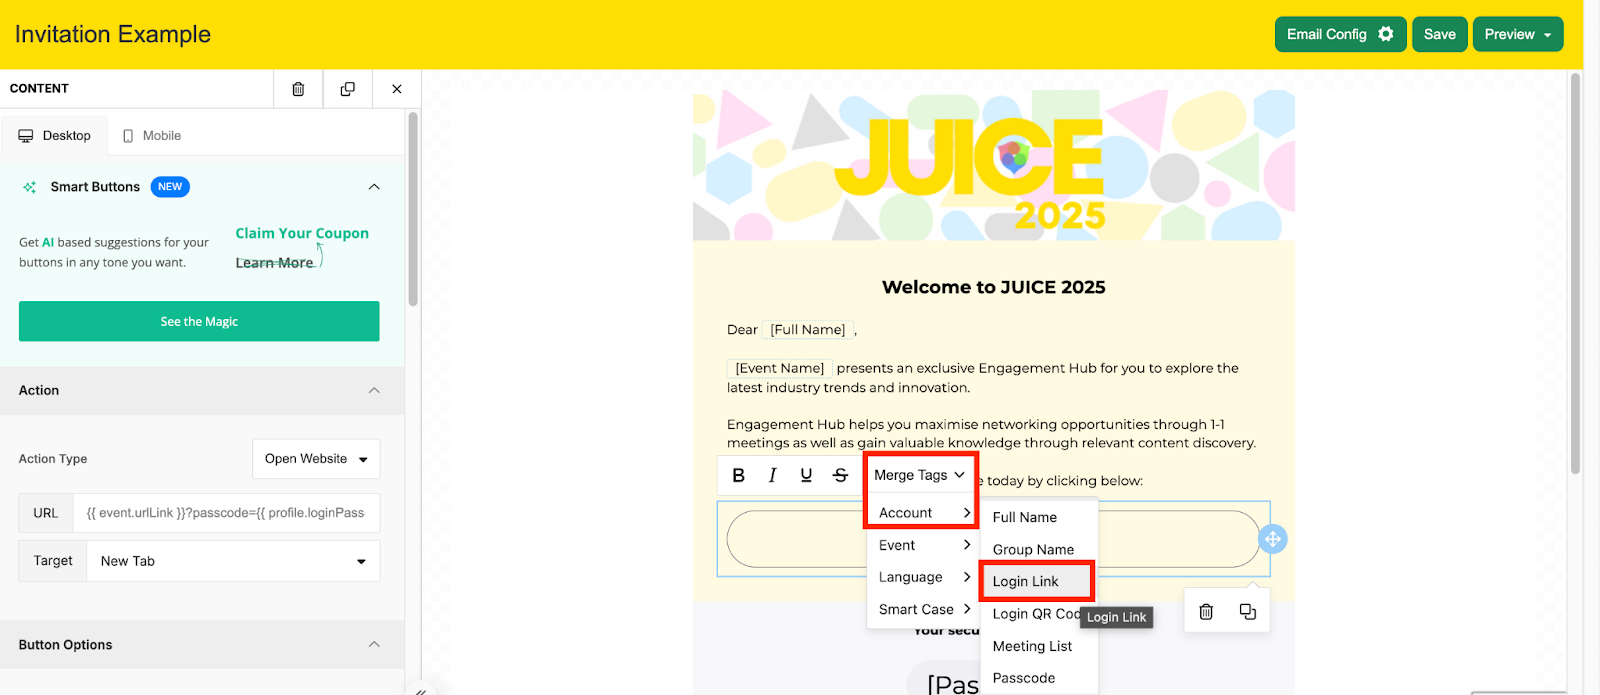
- Buttons can link out to external sites or dynamically to a feature on our platform, using the dynamic codes in Merge Tags or a URL link that you input in the URL field on the left panel.
In the example below, the Magic Link button is the direct access link to a user’s account. To retrieve the URL for the access link, click on Merge Tags > Account > Login Link and add the dynamic code to the URL field* on the left.
*Kindly ignore the “Please enter a URL” prompt if it appears.

Step 3: Email Config, Save and Preview
- Email Config allows you to edit your template name and subject of the email
- Click on Preview at any time of editing the template, and to have a final look before saving. If your event has multiple languages, you may preview all languages at once or select the language you would like to view it in.
- Once you are satisfied with the email design and template that you have created, click on Save.
Jublia Template - Native App Invitation Email
The same logic applies for standalone event app invitation templates. You can directly edit the Jublia template to customize your messaging for your attendees, as well as include the app download links by adding the App Download/App Link merge tag or once they’re published in the app stores.
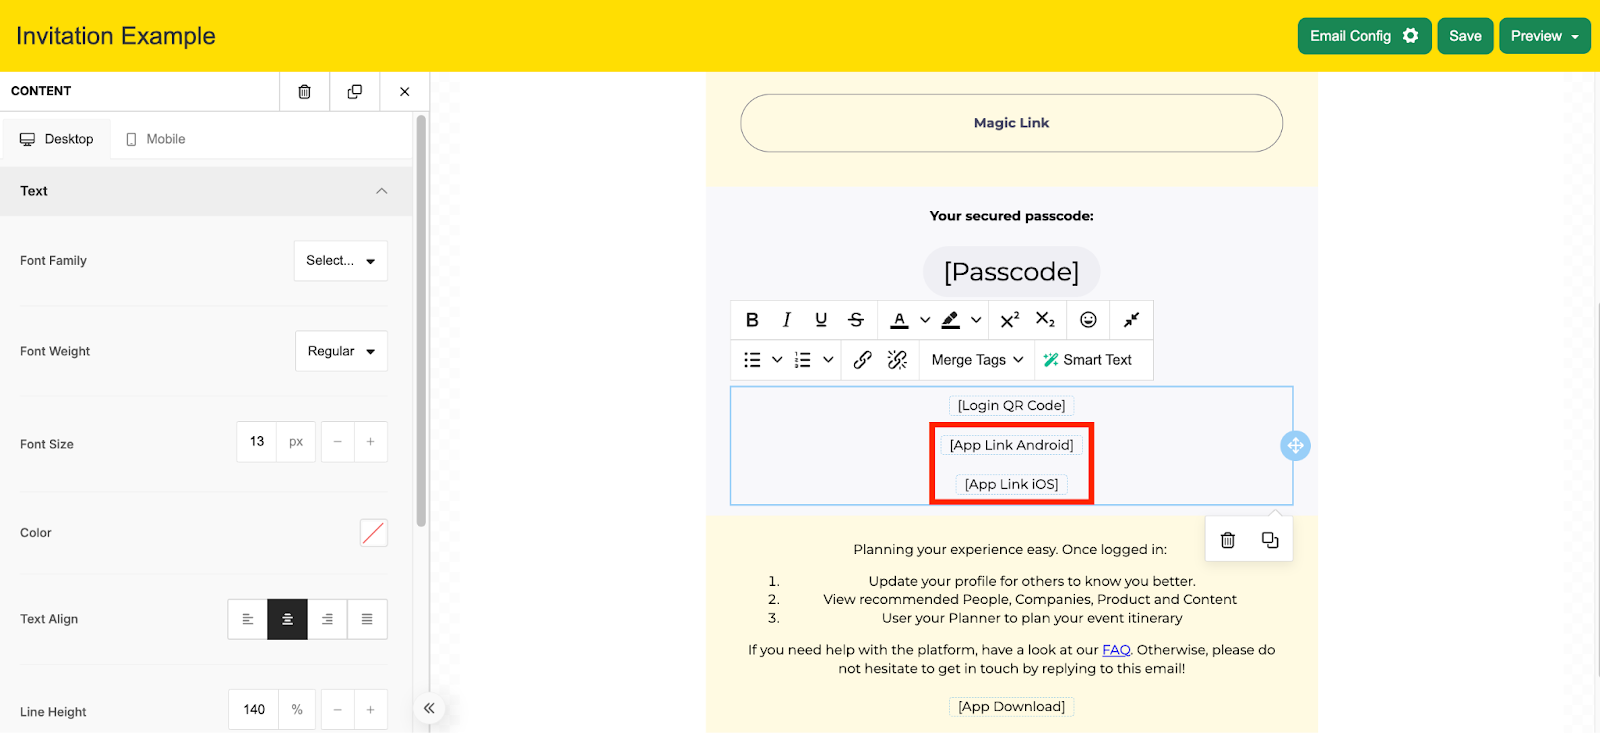
Step 1: Add App Download/App Link Merge Tag
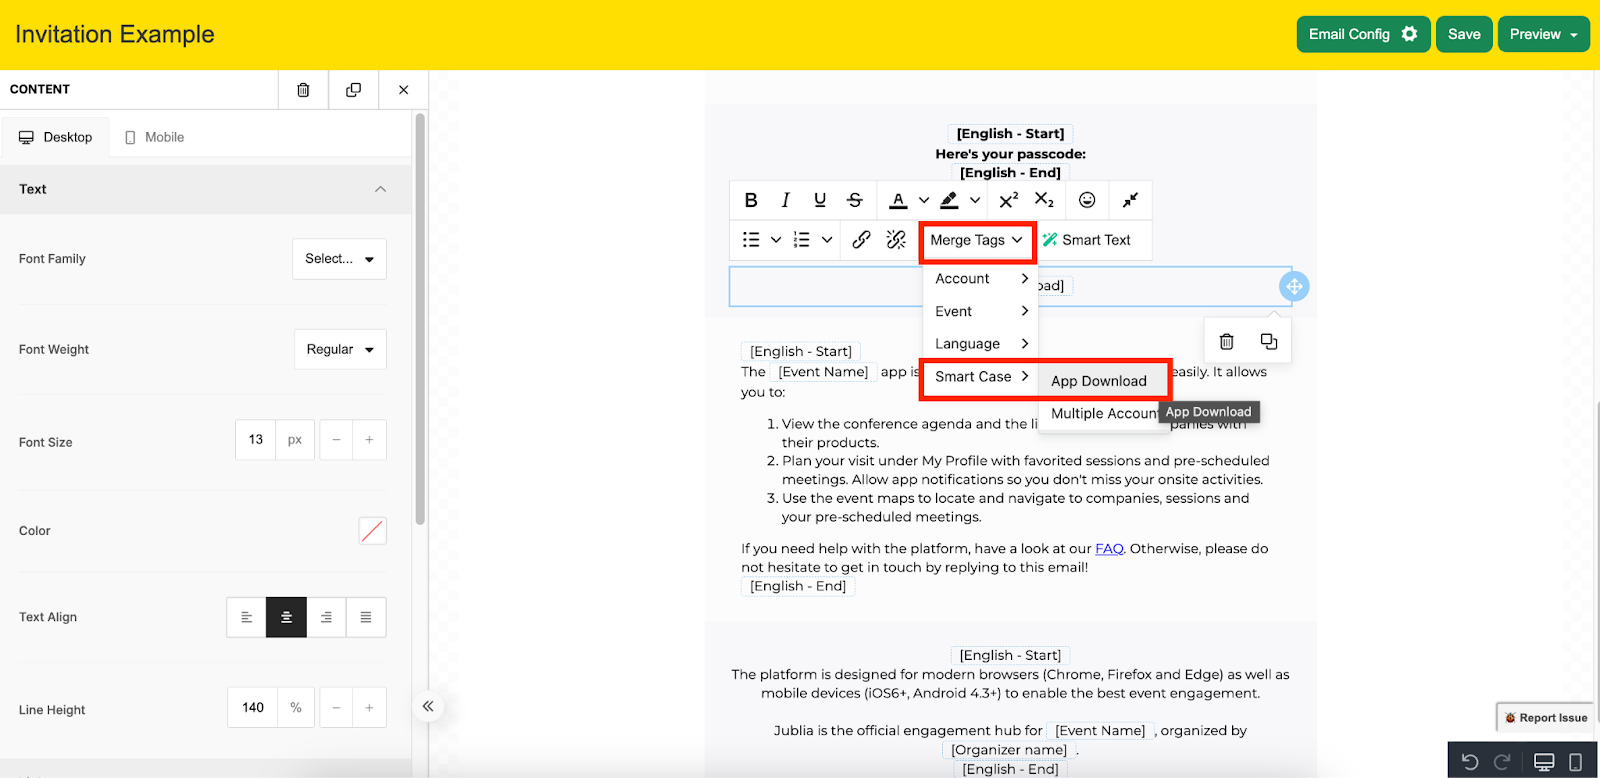
- Following the paragraph below the QR code for logging in, click within the same text box and select Merge Tags from the toolbar.
- Click on Smart Case > App Download if you want to insert both the iOS and Android download buttons in your email.
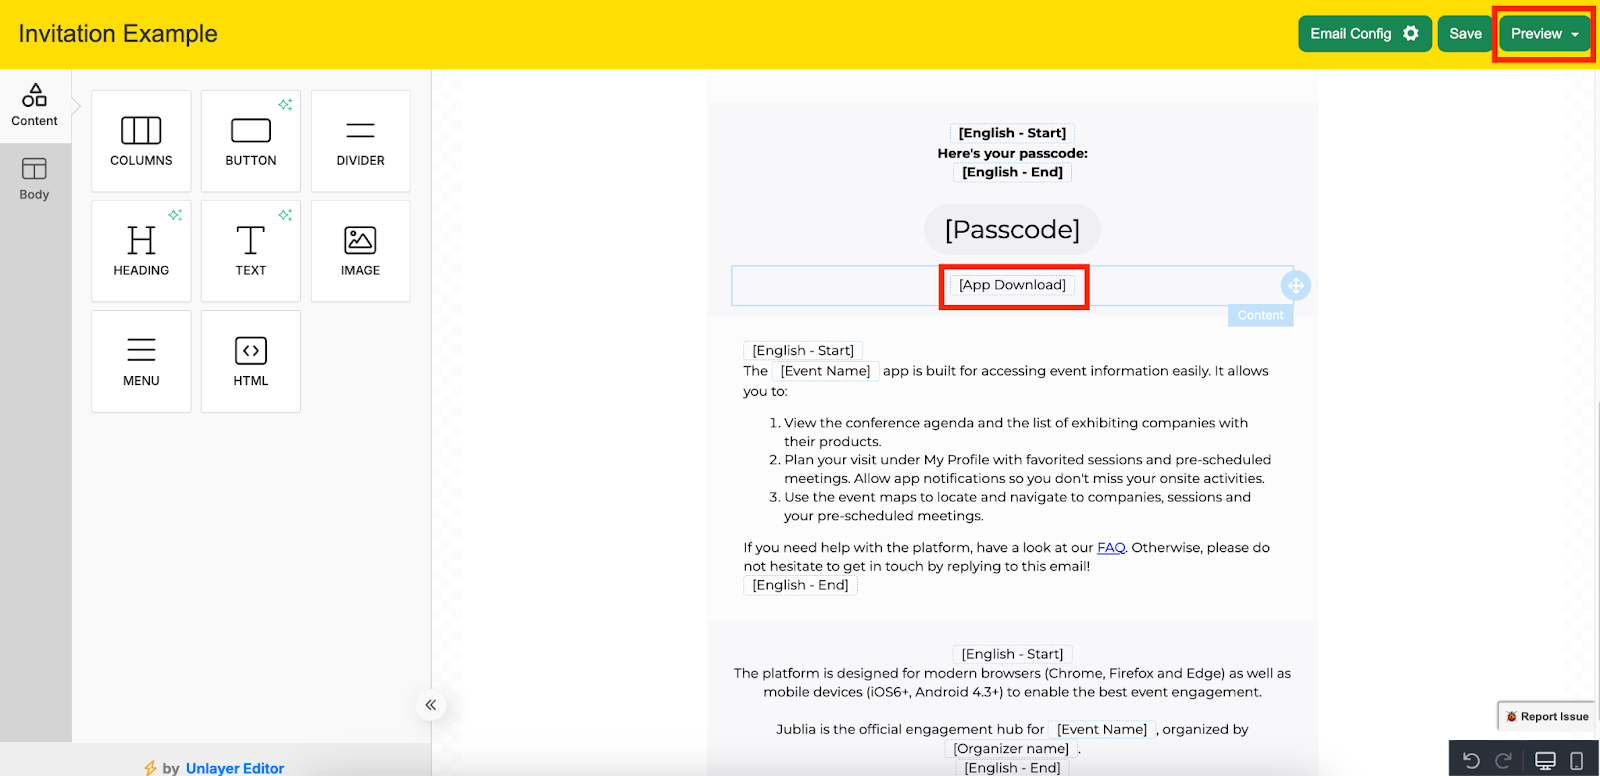
- The [App Download] merge tag will appear in the text box.
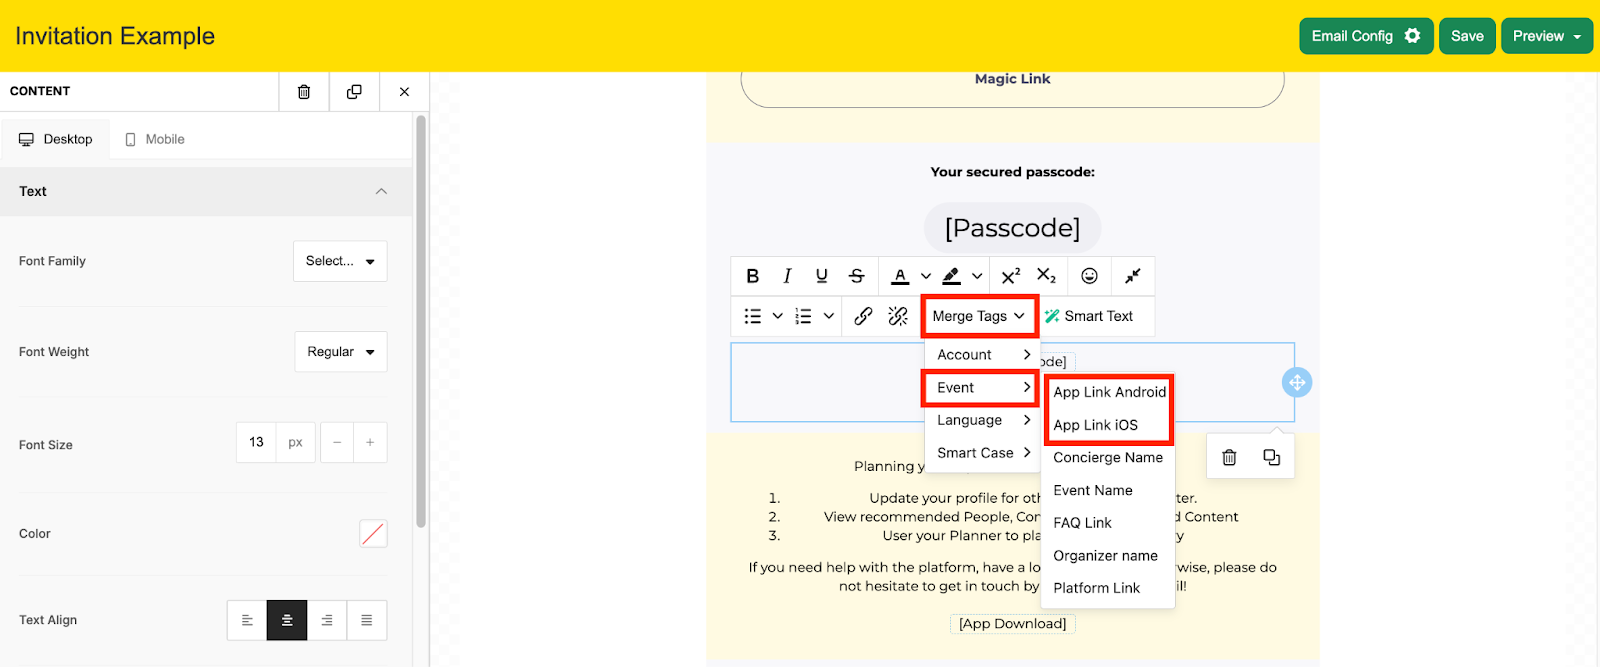
- If you would like a specific app download link for either iOS or Android, click on Event > App Link Android or App Link iOS.
- The [App Link Android] or [App Link iOS] merge tag will appear in the text box.
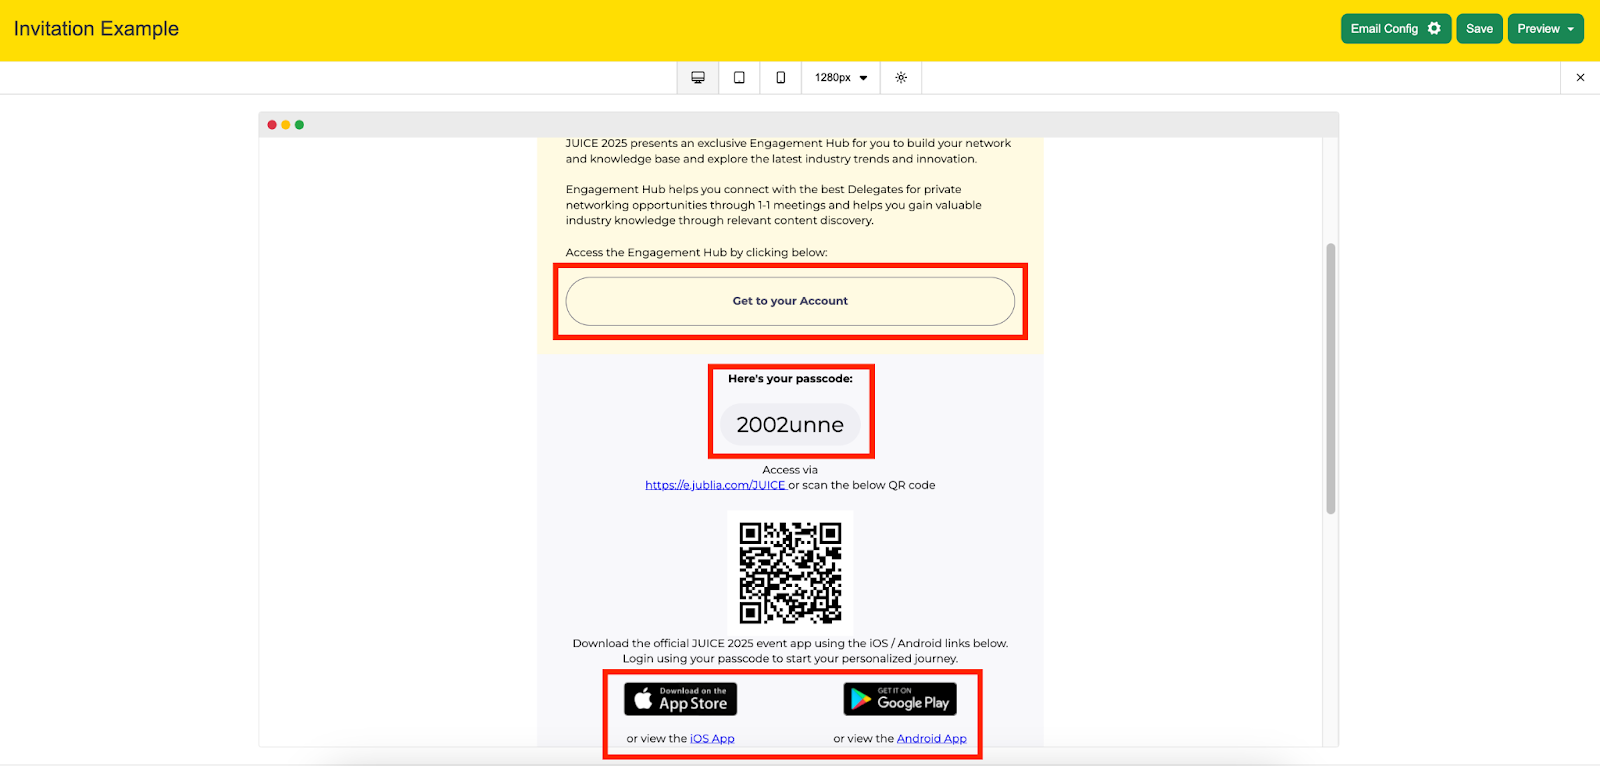
Step 2: Preview and Test
- Click on Preview to check if the app download links for iOS and Android are showing up correctly.


Jublia Template - Combined Web and Native App Invitation Email
For events with both the Web and Native app, the default Jublia template would have all the information required for both platforms, with the exception of the native app download links.
To fully furnish the template, repeat the steps as shown in Jublia Template - Web App Invitation Email and Native App Invitation Email to edit the content and add the app download links via the merge tag.
Best Practice
- If you are launching the Native App after the Web App, remember to update your Invitation email template to include the app download links once the Native App is live and published in the app stores (see: Jublia Template - Native App Invitation Email)
Jublia Template - Recommendation Email
Step 1: Create a New Jublia Template
- Under Email Type, select Recommendation.
- Select Jublia Template, add Template Name and click on Create. Your template will be stored in the panel on the right under Stored Templates.
Step 2: Edit the Selected Template
Once you have created the new template and hit the edit button, you will be redirected to a new tab where you can start editing the default template and make the changes you think are necessary.

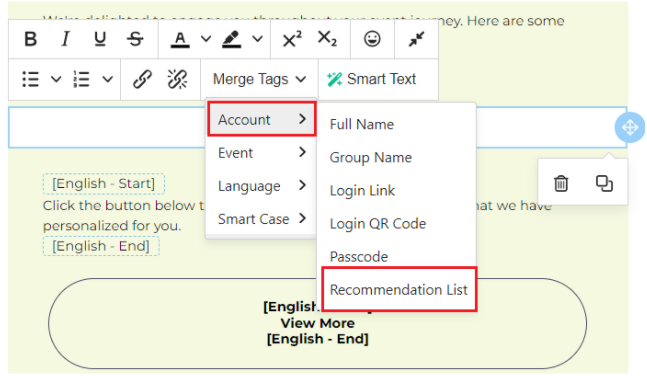
You can directly edit the Jublia template to customize your messaging for your attendees, as well as include the Recommendation Merge Tag to show the recommended user list.
Jublia Template - Structured Meetings Scheduled Email
Same logic applies for the Final Structured Meeting Schedule Email sent the day before the first day of meetings to send to the users the up to date meeting schedule.
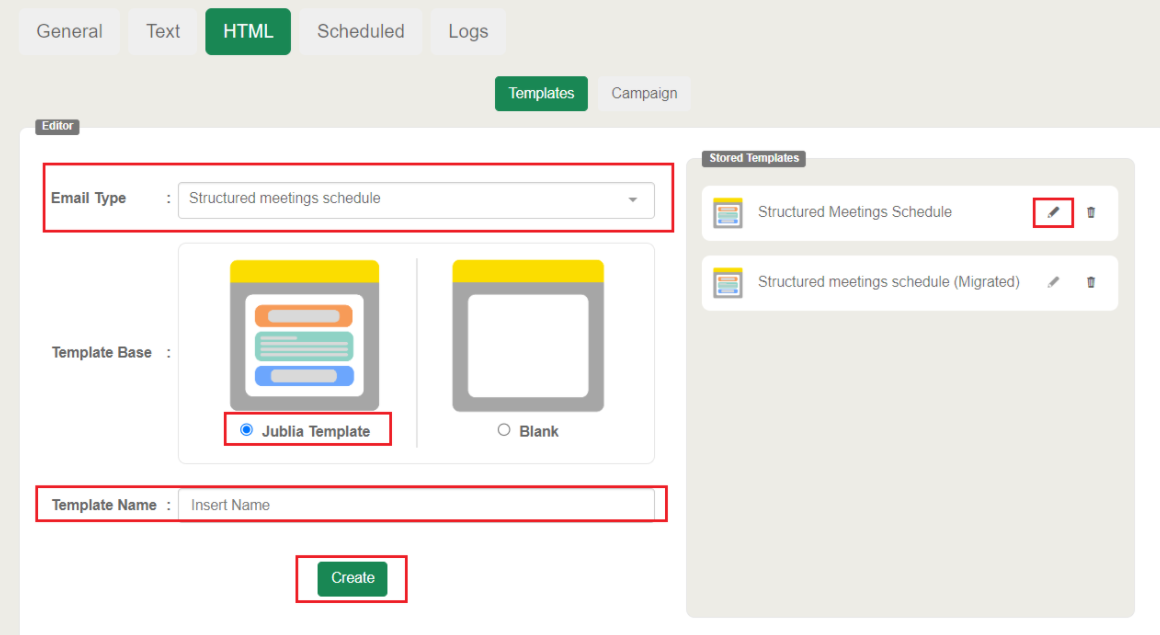
Step 1: Create a New Jublia Template
- Under Email Type, select Structured Meeting Schedule.
- Select Jublia Template, add Template Name and click on Create. Your template will be stored in the panel on the right under Stored Templates.
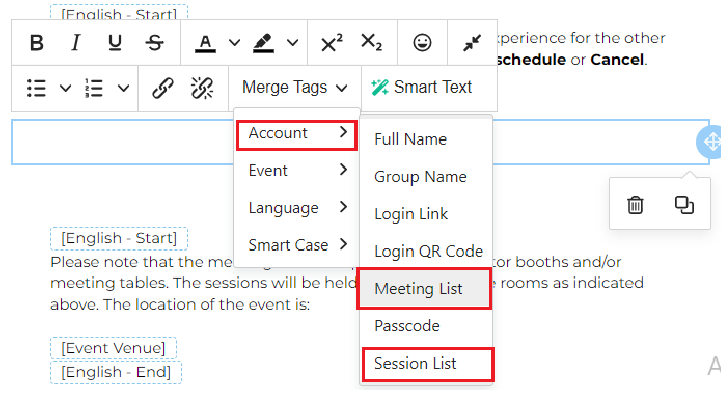
You can directly edit the Jublia template to customize your messaging for your attendees, as well as include the Meeting List or the Session List Merge Tag to show the up to date meetings schedule and the latest favorited agenda sessions.
Jublia Template - Unstructured Meetings Scheduled Email
If your event is using the chat only meeting rule, you can also send the Unstructured Meetings Scheduled to all those with chat conversations scheduled.
Step 1: Create a New Jublia Template
- Under Email Type, select Structured Meeting Schedule.
- Select Jublia Template, add Template Name and click on Create. Your template will be stored in the panel on the right under Stored Templates.

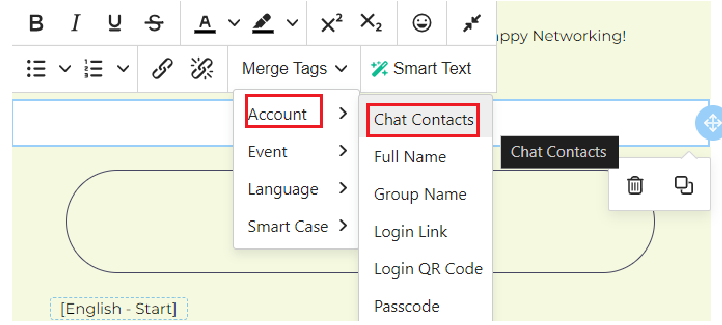
You can directly edit the Jublia template to customize your messaging for your attendees, as well as include the Chat Contacts merge tag to show the up to date chat meetings scheduled.
Sending out your email
To send out your new email template, follow the instructions on this guide:
Email Courier: How to send out HTML emails through Campaign