.png)
Email Courier: Managing Engagement Emails
Effectively managing engagement emails is essential for keeping event participants informed, encouraging interactions, and maximizing the value they gain from your event. The Email Courier allows you to customize messages, schedule them strategically, and target specific groups.
Through the following sections, you will learn how to manage engagement emails in the Email Courier, including targeting, customizing, scheduling, and tracking email campaigns:
Text Tab
The Text Tab allows you to create and manage text-based engagement emails. Below are the steps to manage your text-based emails efficiently.
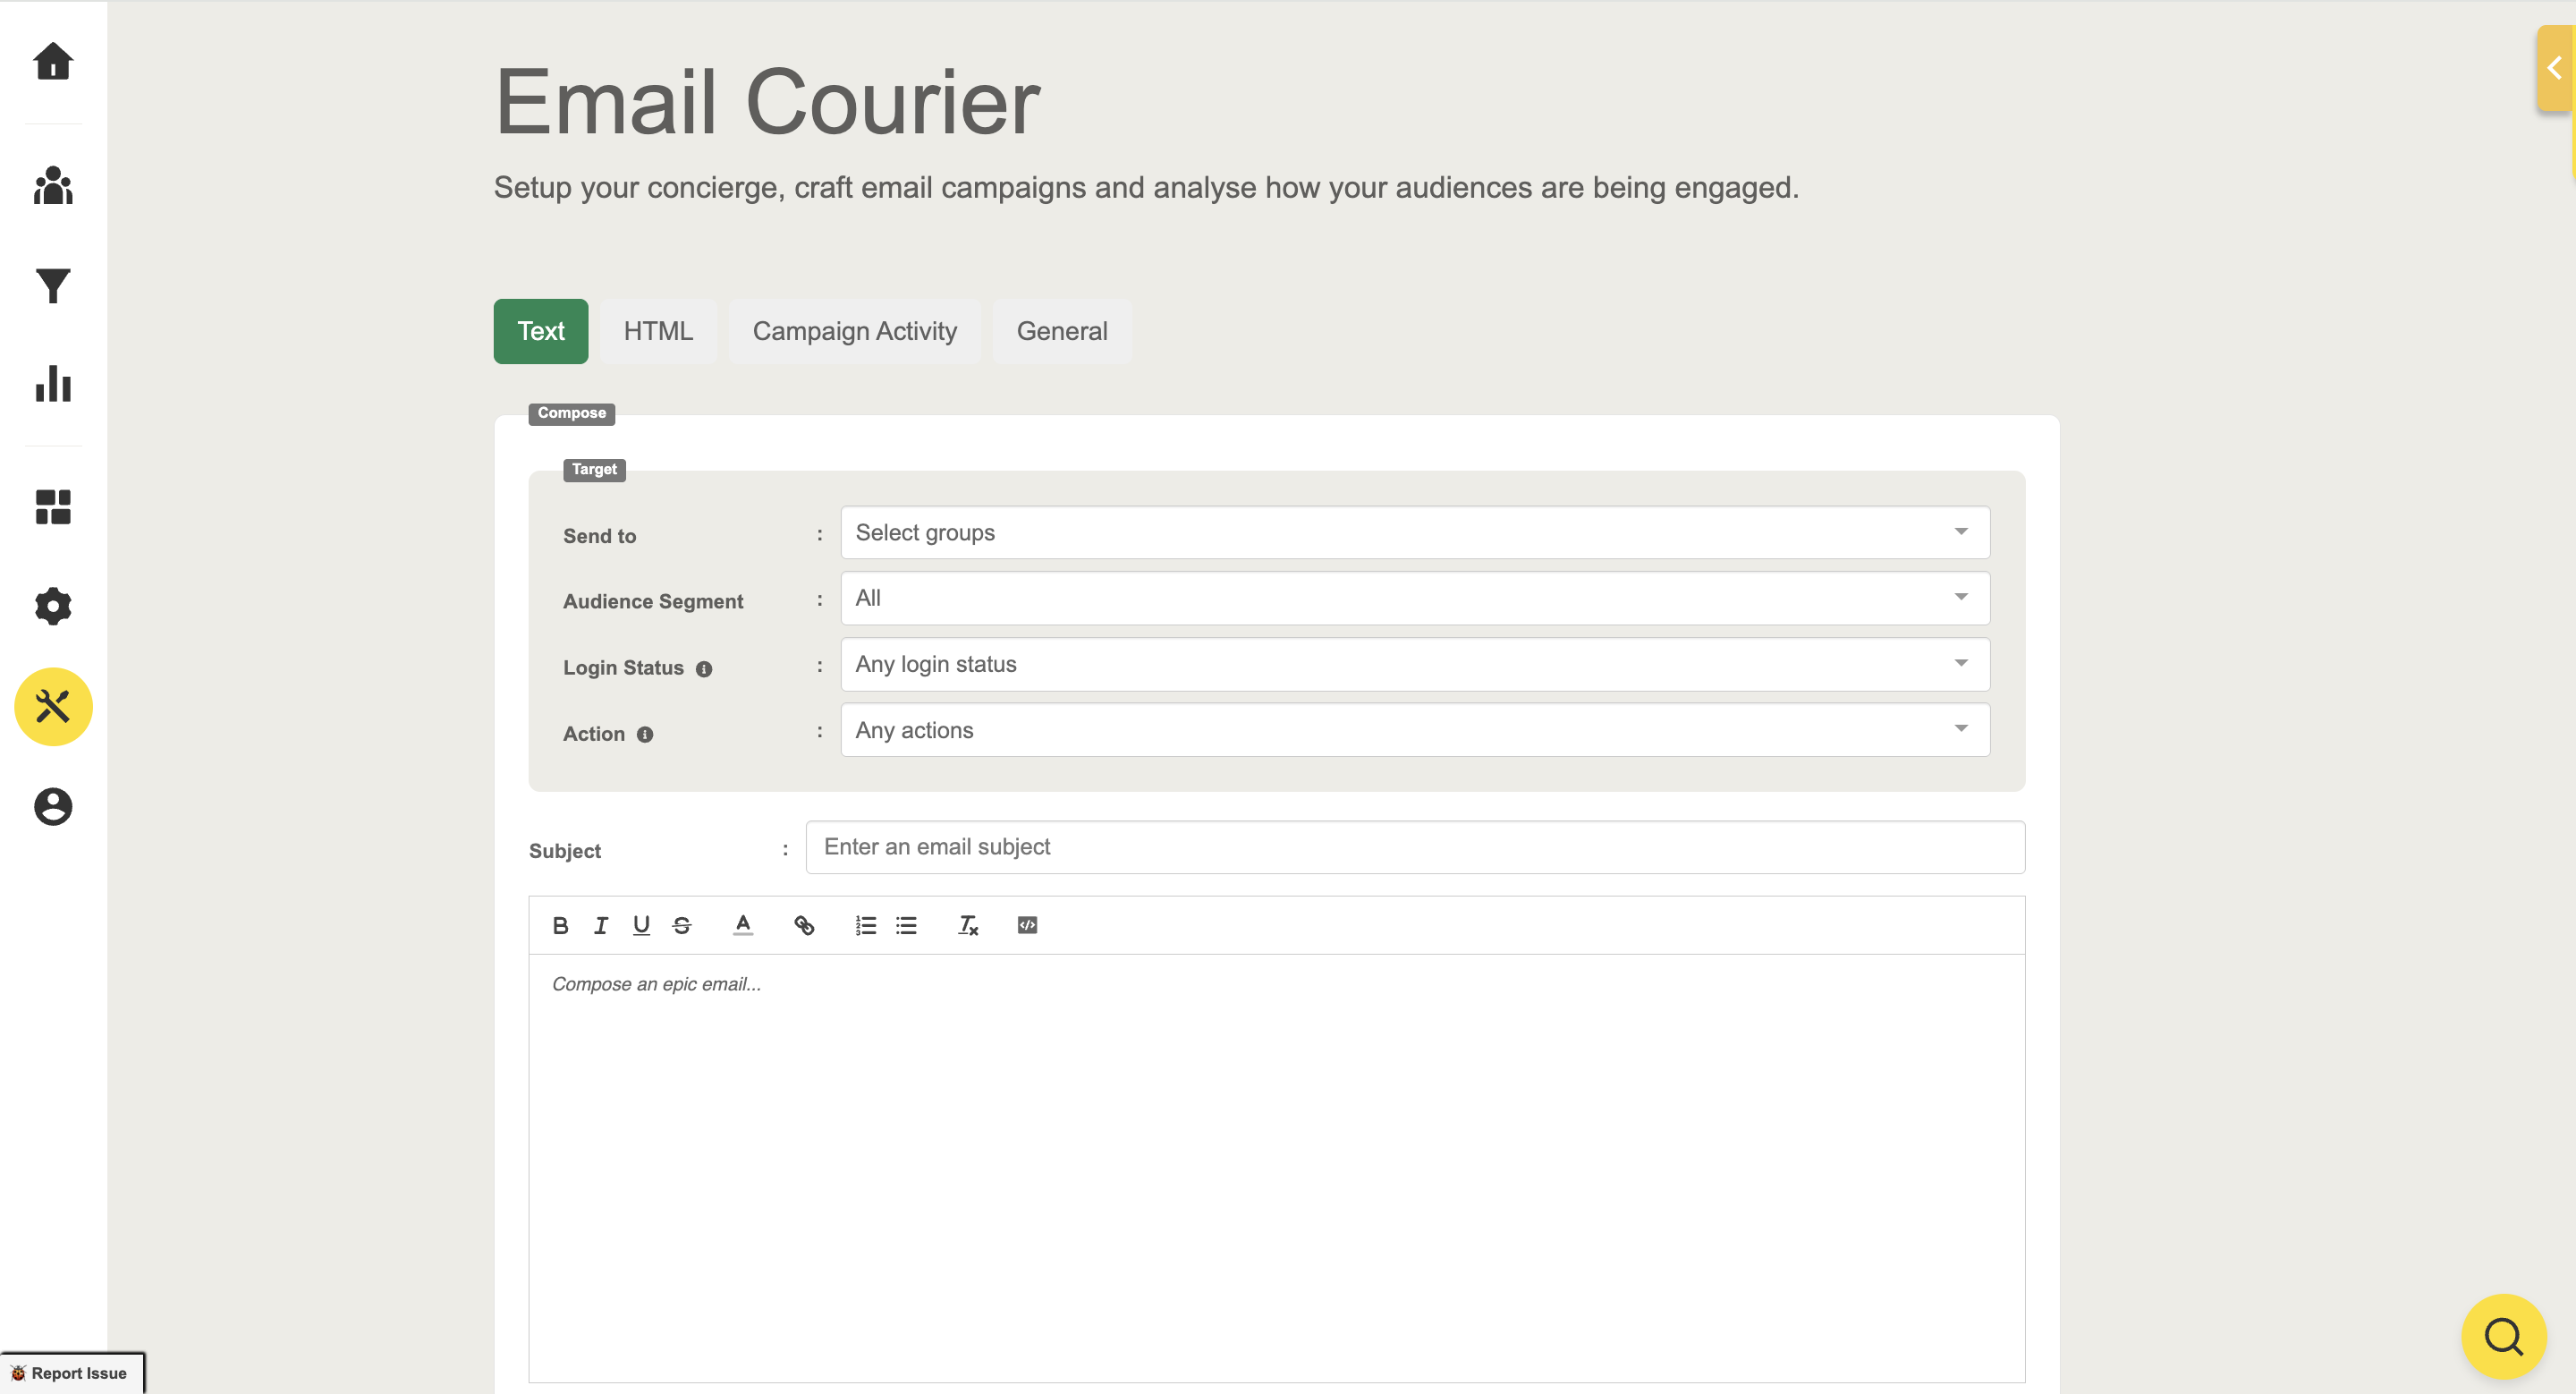
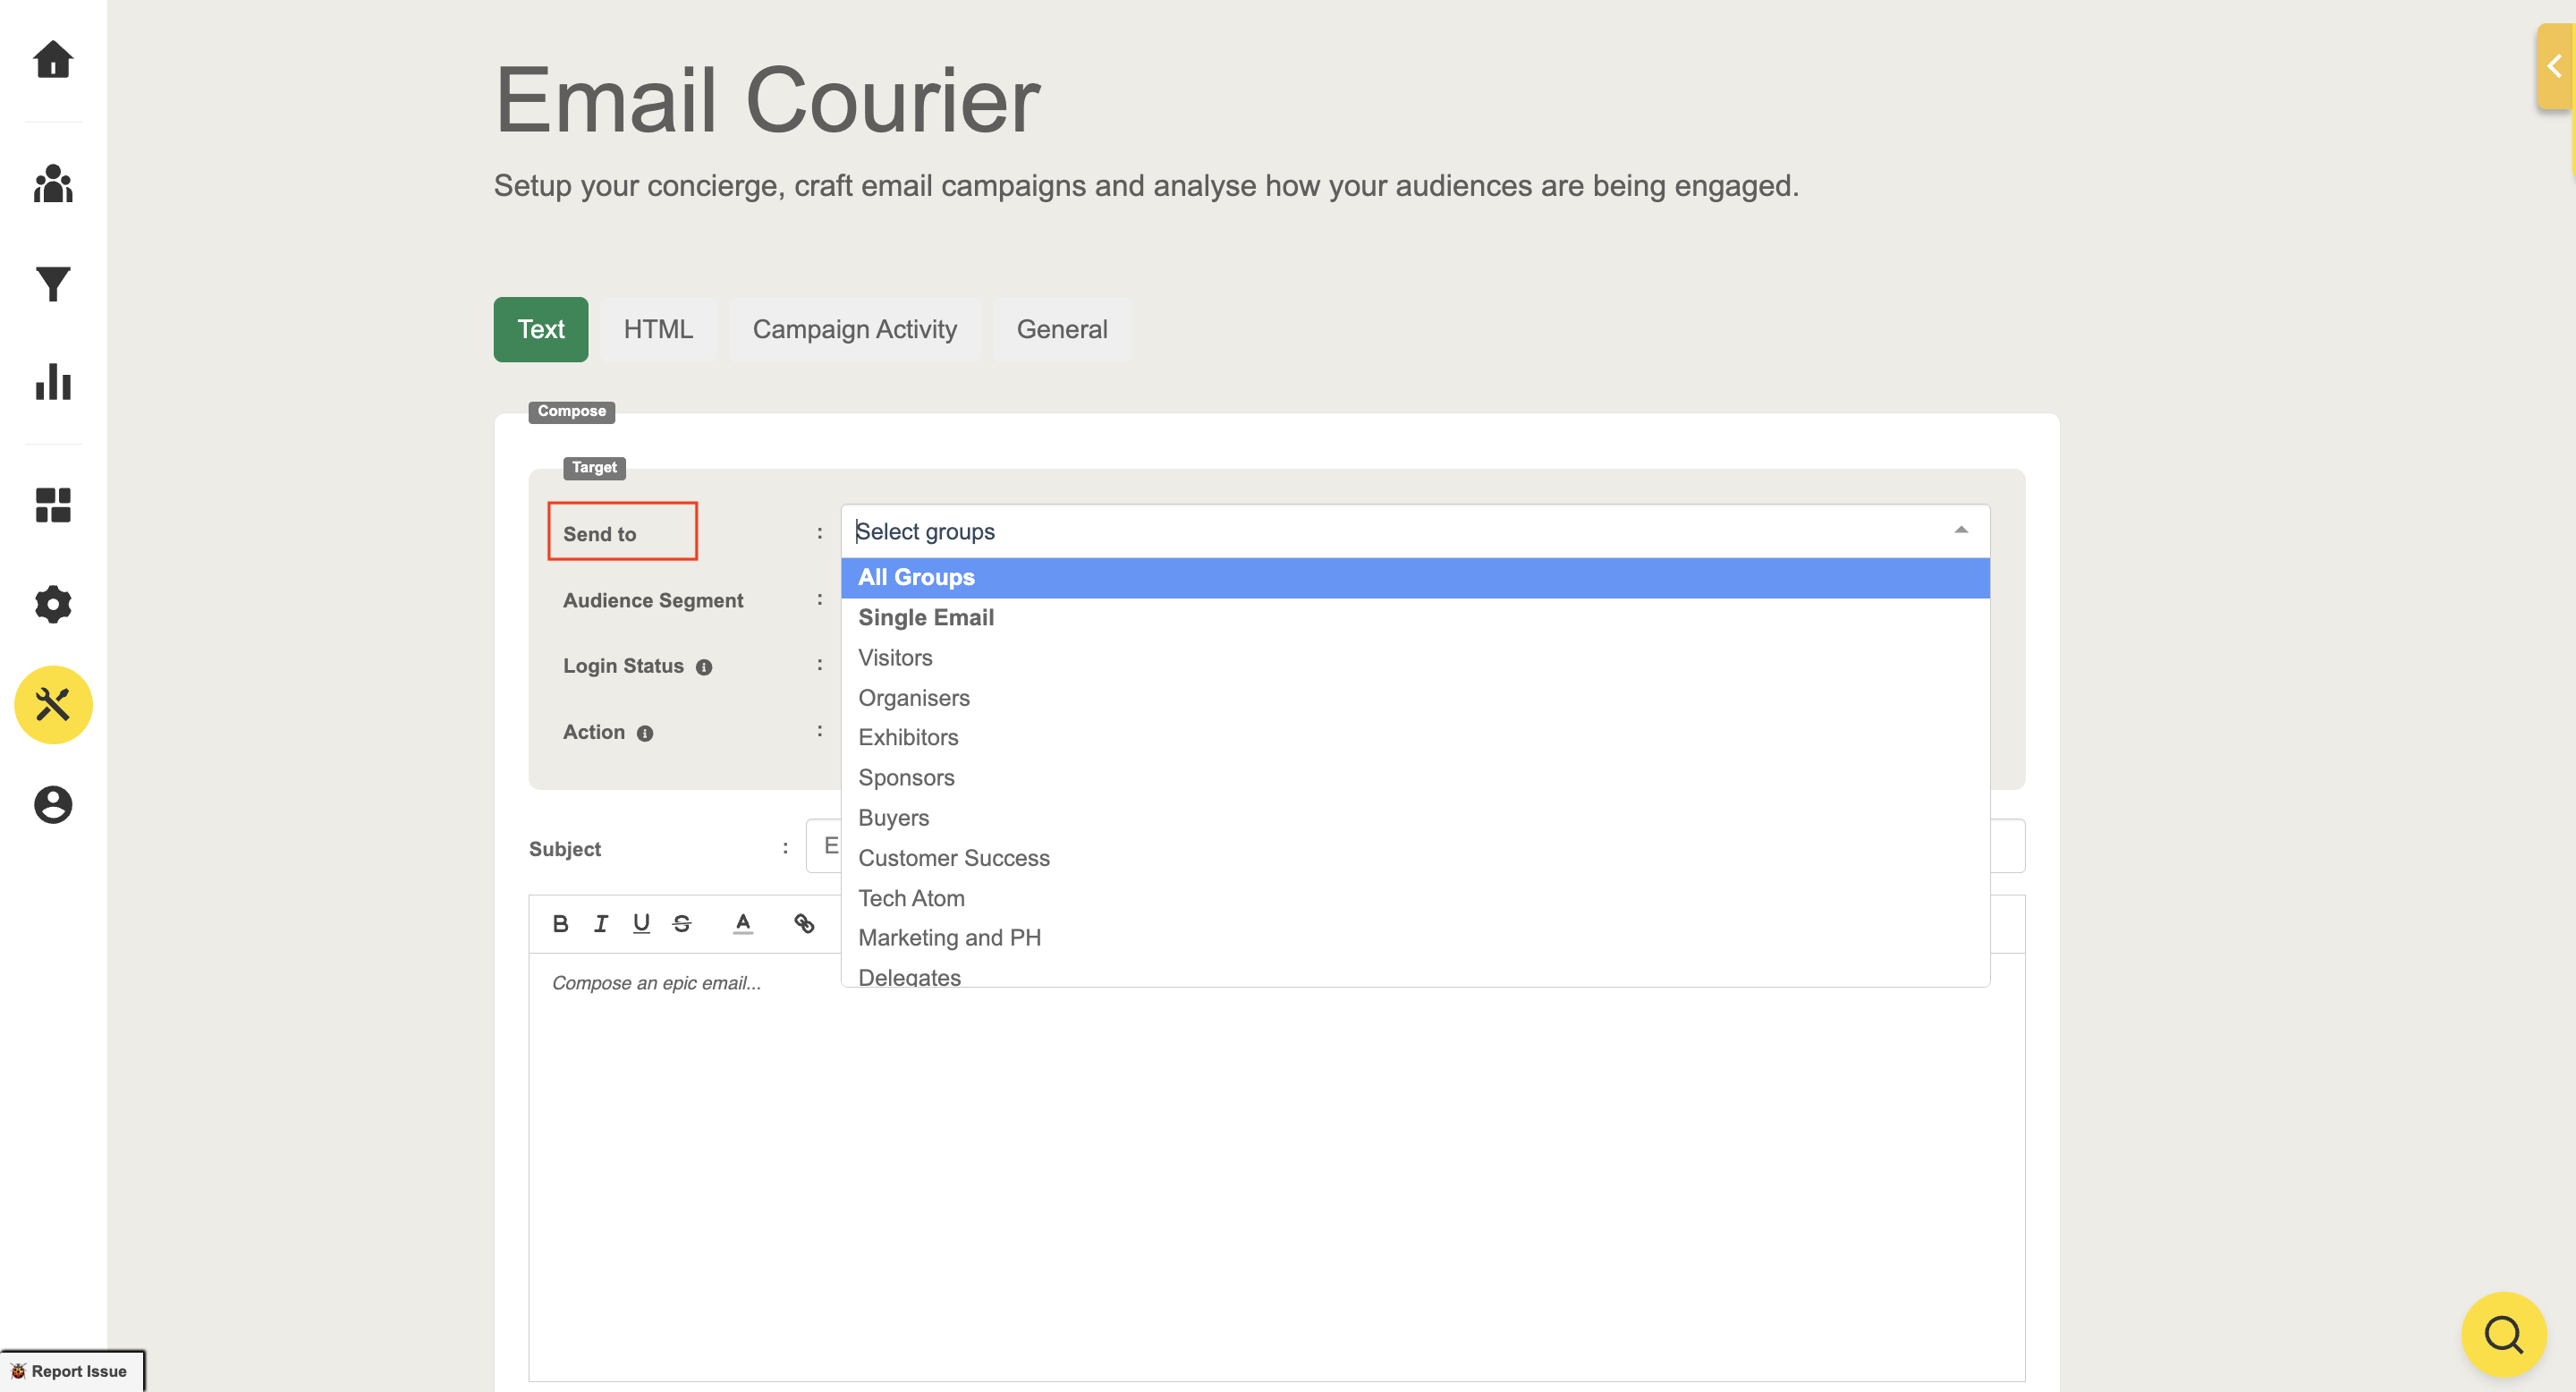
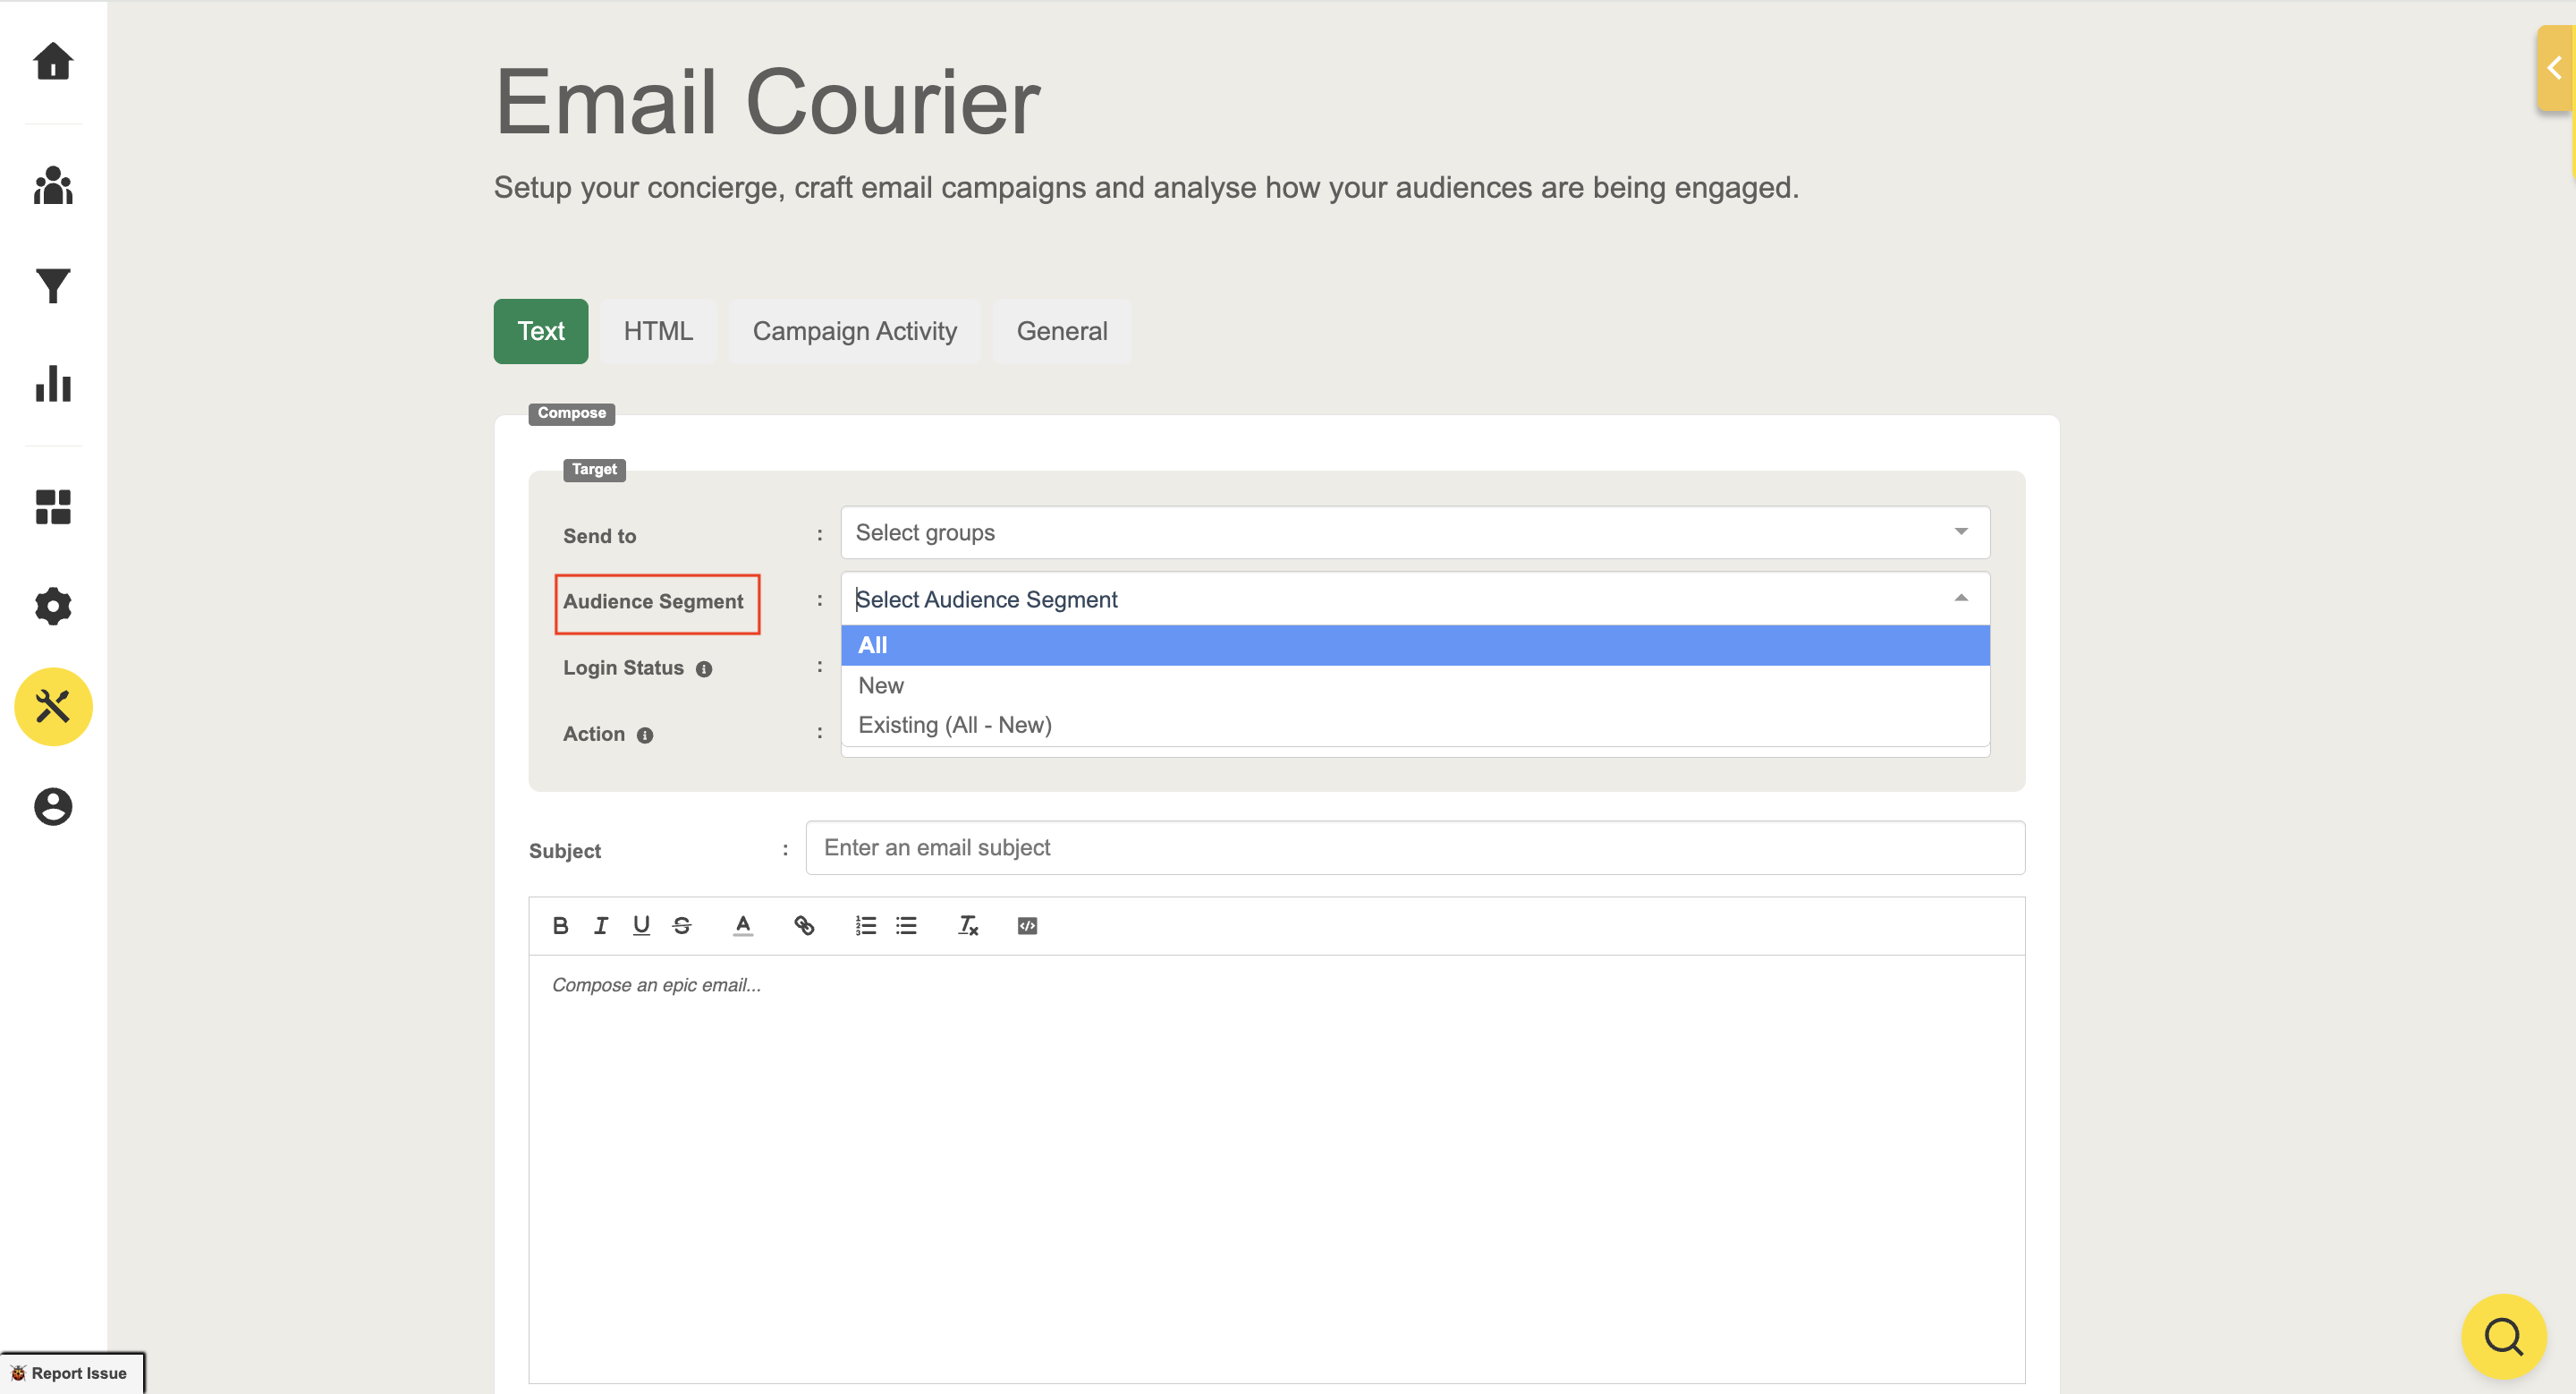
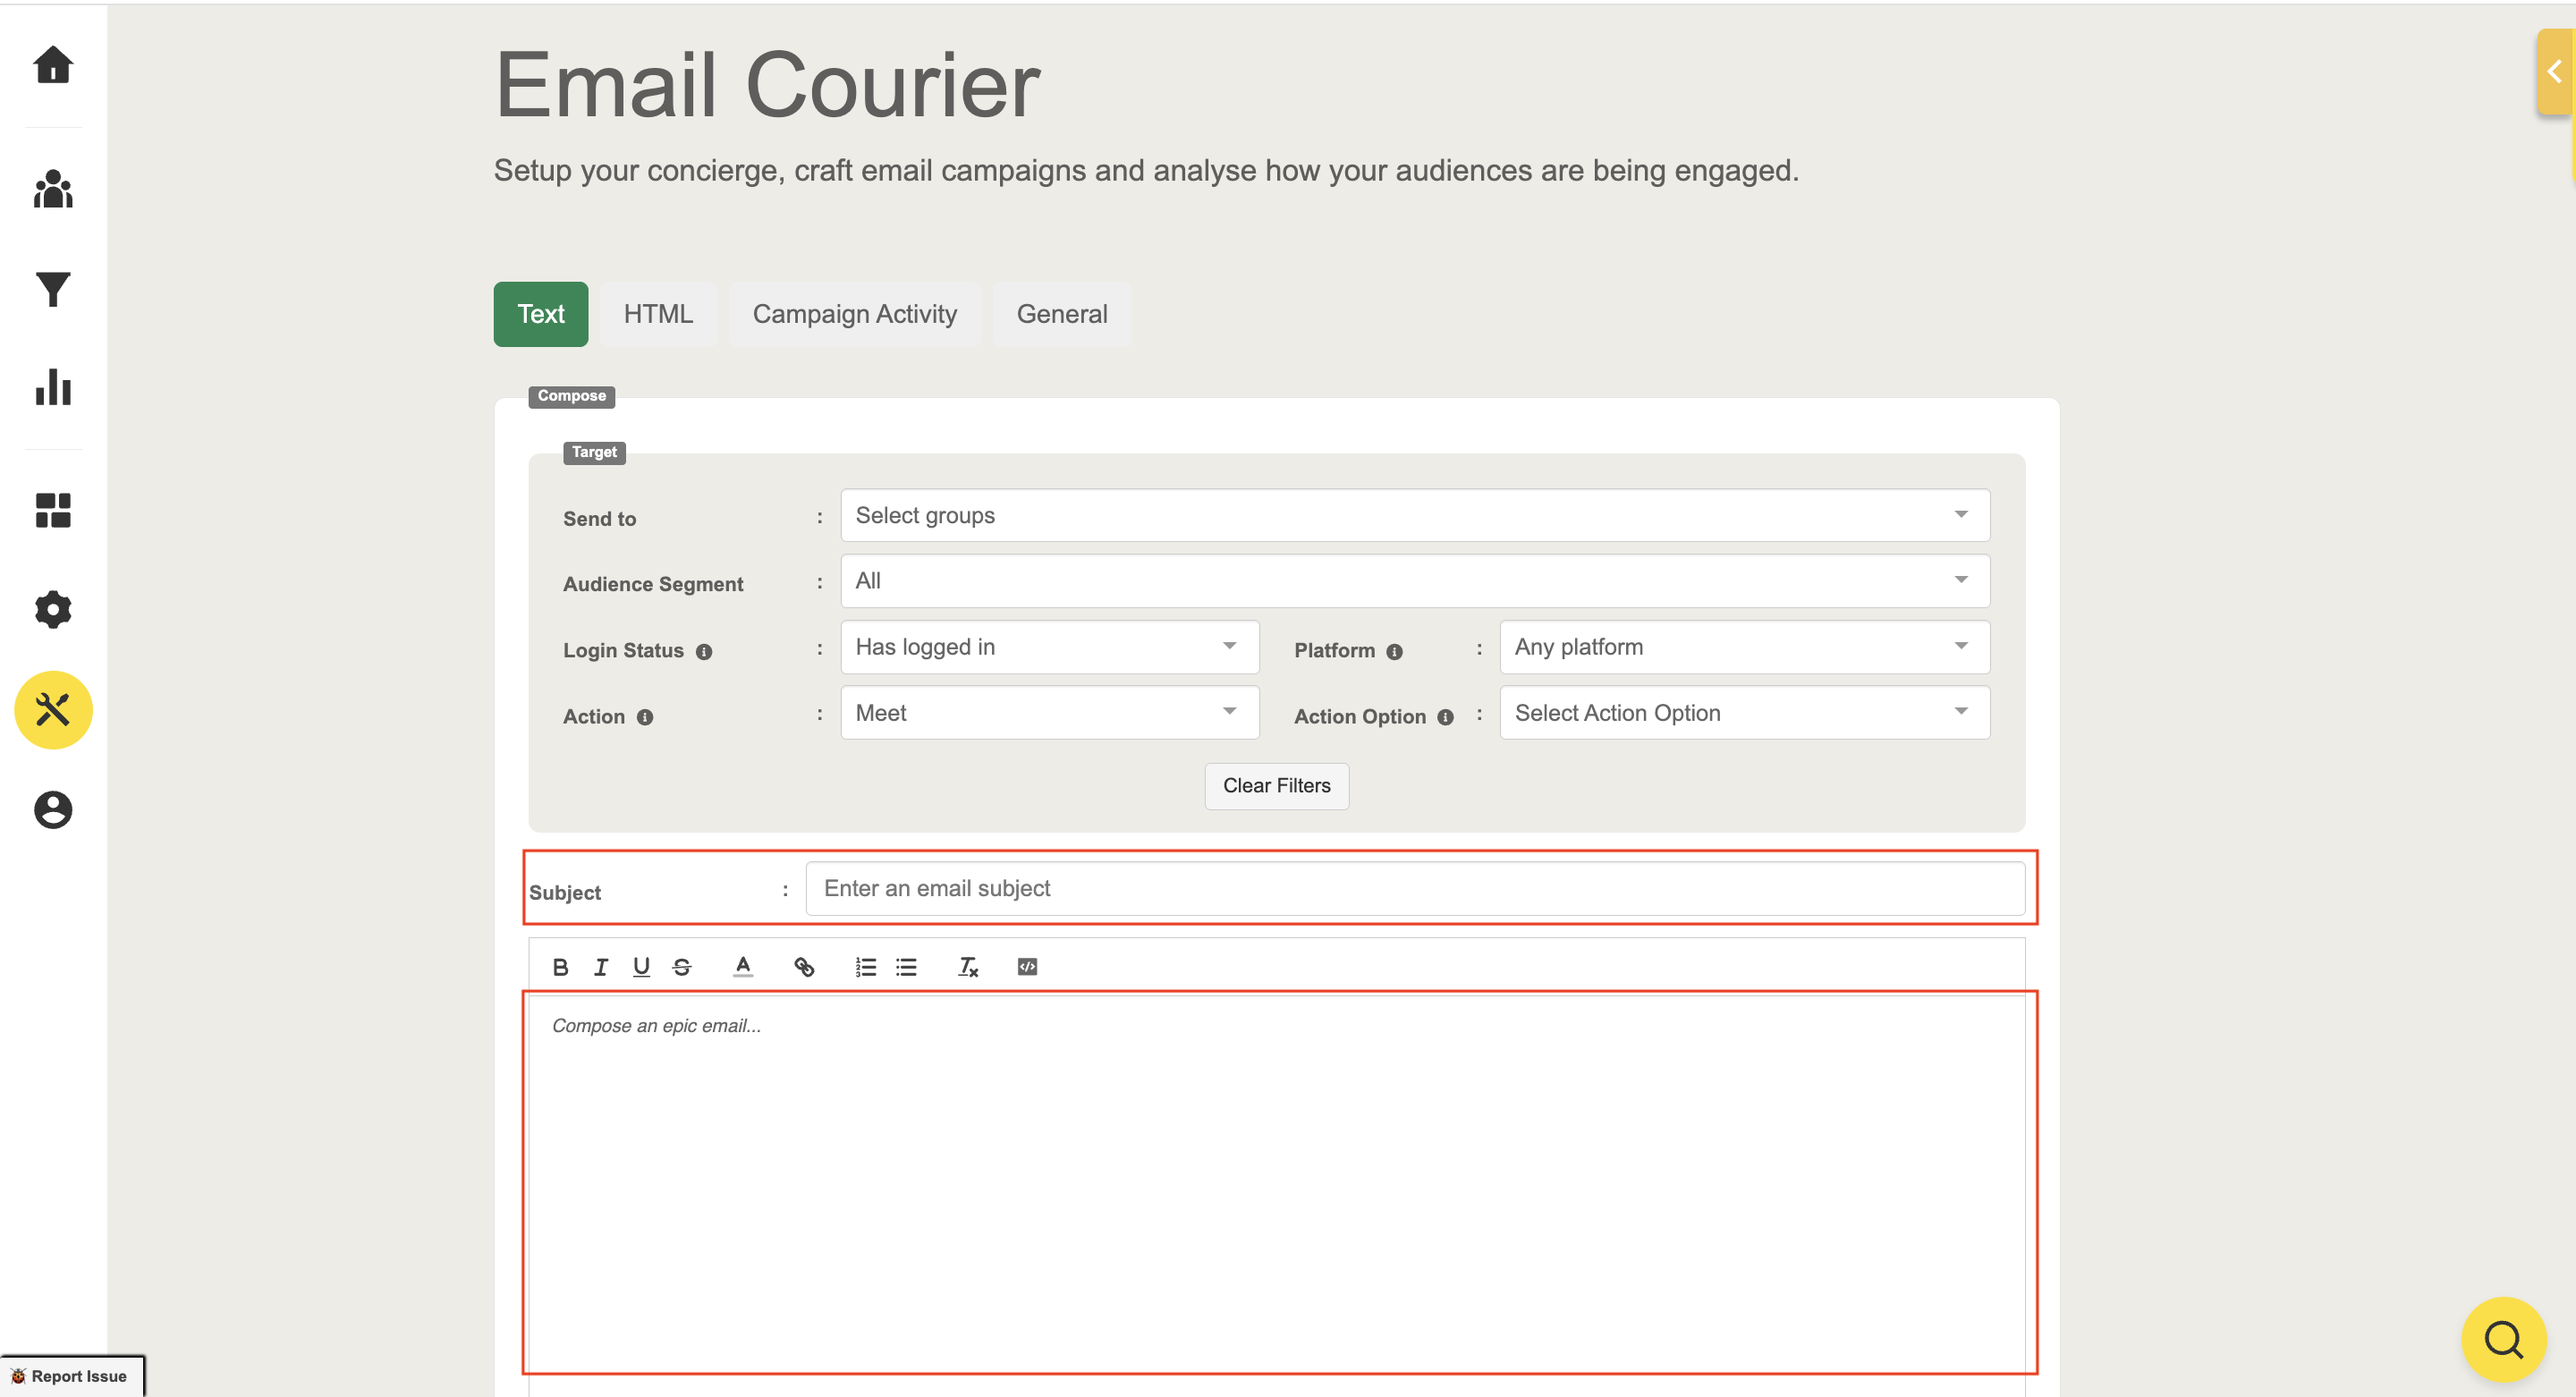
Step 1: Selecting Recipients
- Choose the recipient type: Select whether to send the email to "All," "New," or "Existing" users.
- Choose the target group: Use the drop-down menu to select specific target groups, or choose "All groups" for broad communication.
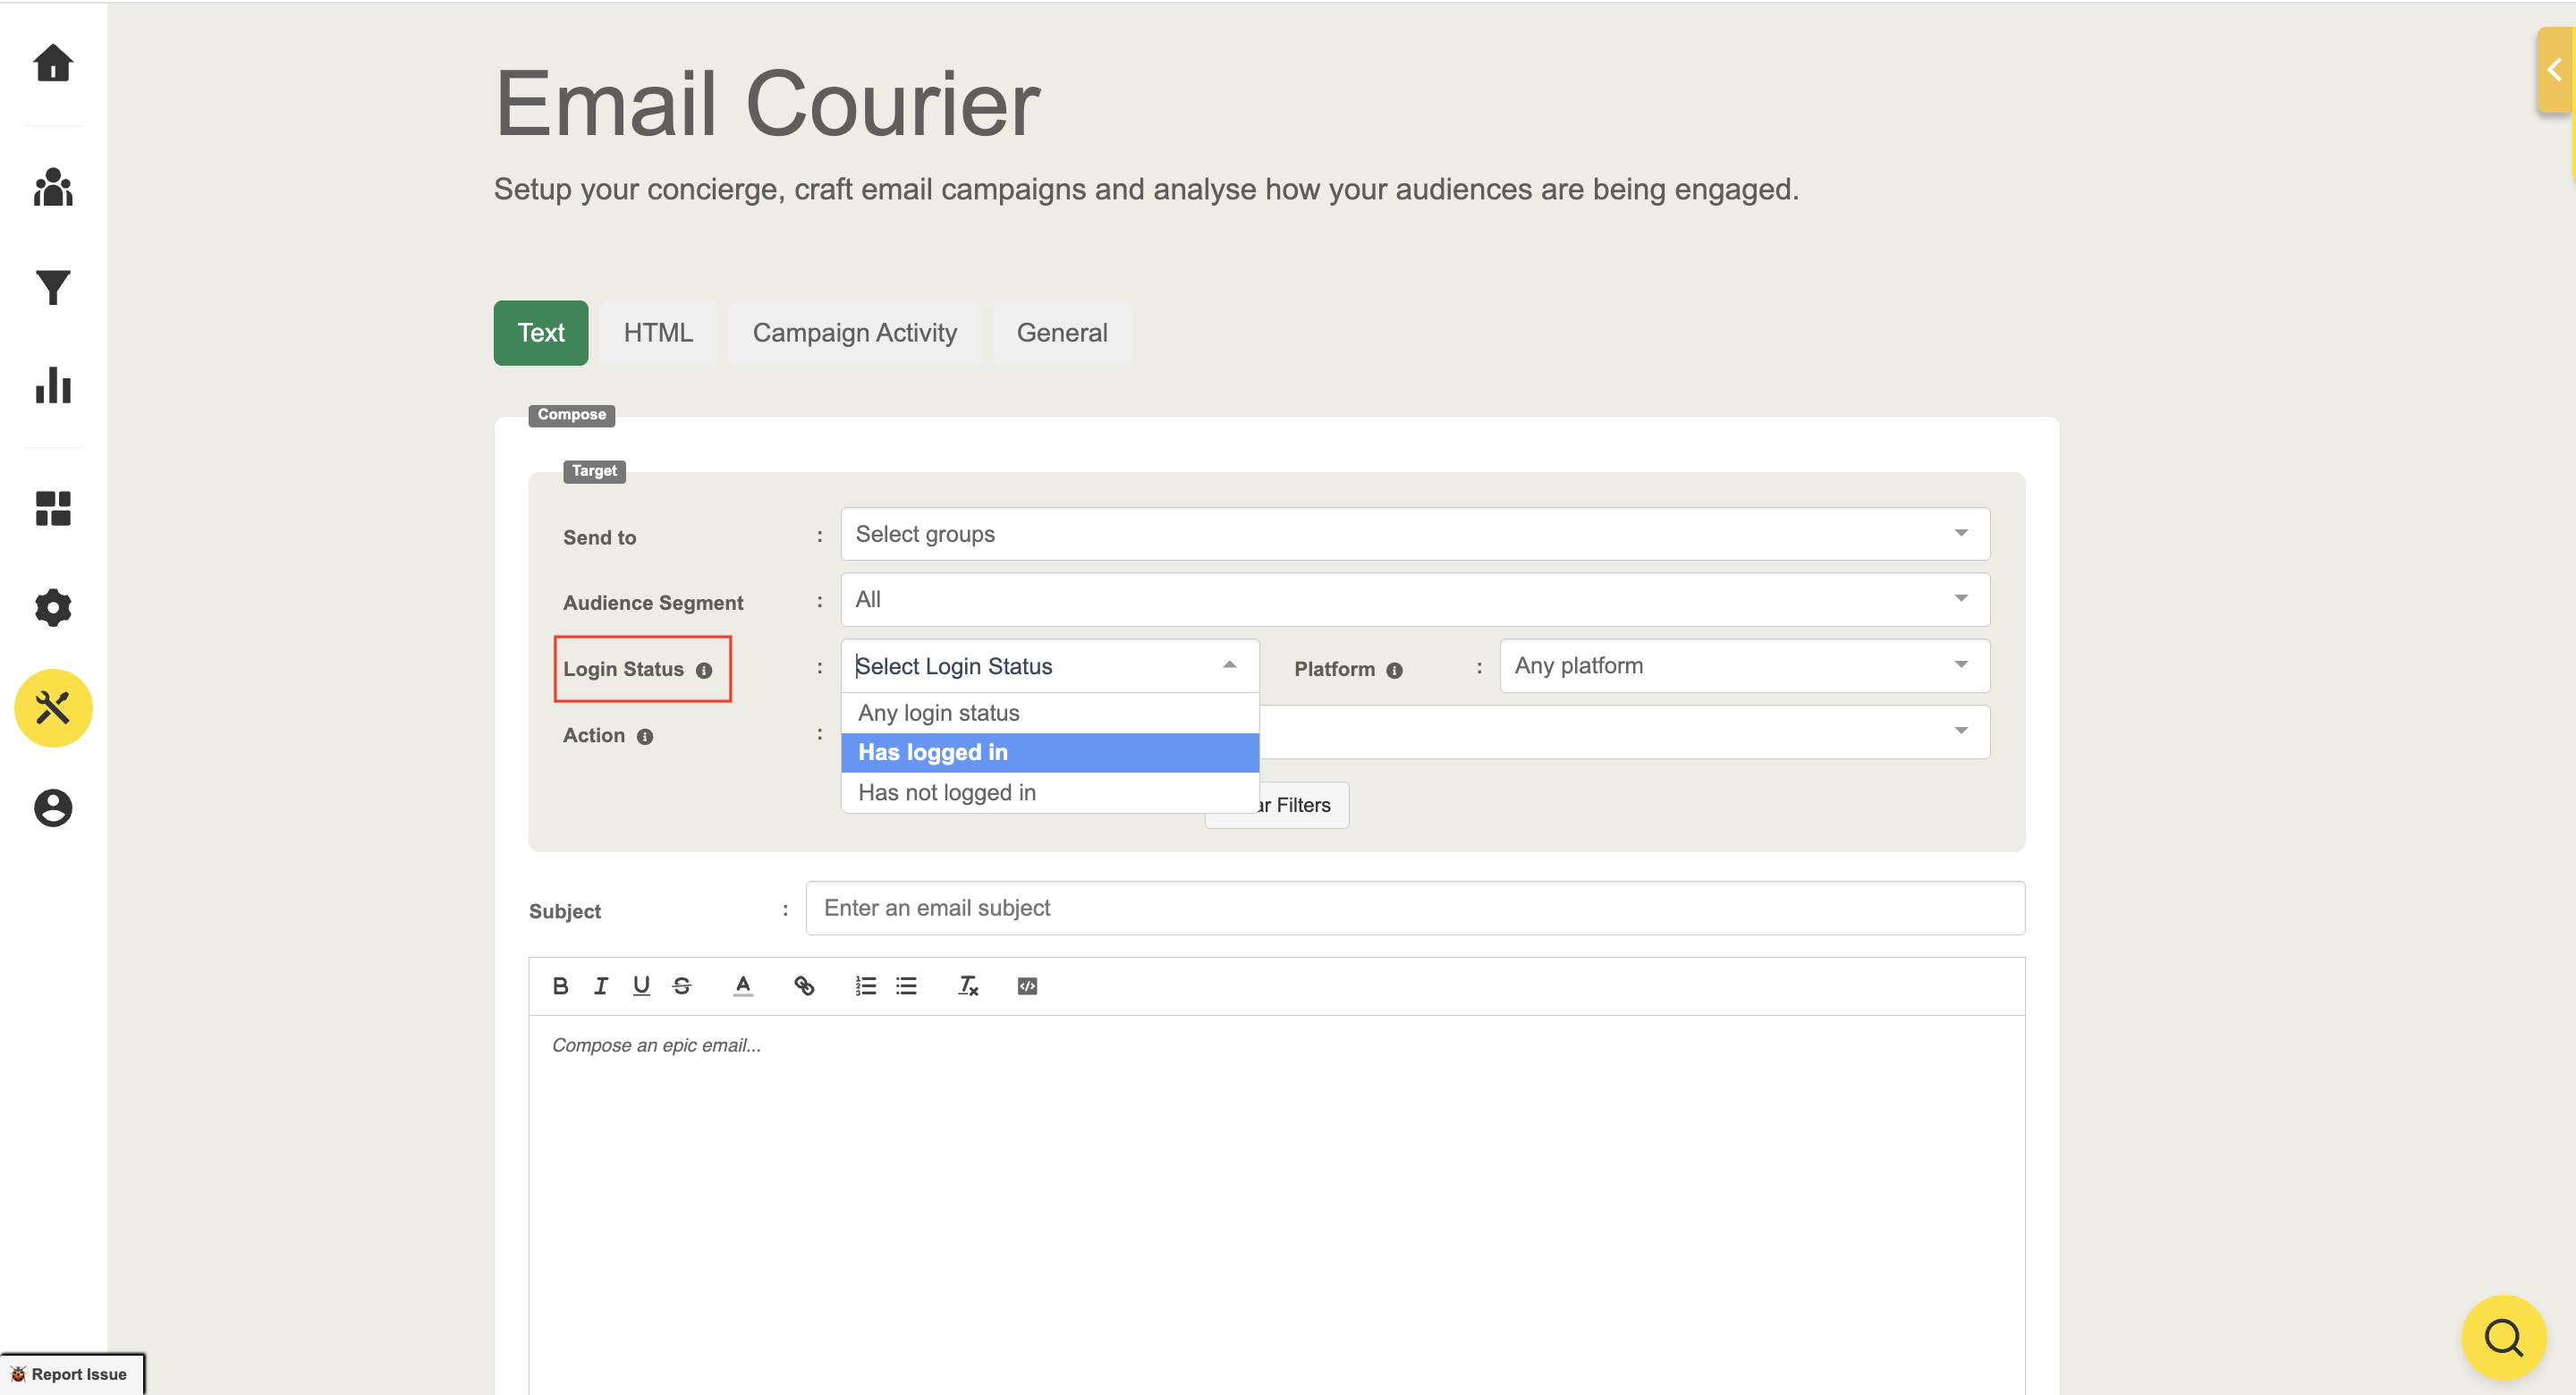
Step 2: Setting Up the Email Content
Segment the email target based on login status and/or action to align with the strategic email purpose.
- Login Status: Target users based on their login status.
- All Login Status or Logged In or Logged Out at Any or Web or Native platform.
- Action: Narrow the segment by recent users behavior.
Any Actions or Profile Completion or Meet or Views/Favorites/Bookmarks or Scan

- Enter the subject: Add a clear, engaging subject line.
- Compose the email body: Write the main message of your email.
Dynamic Codes
Use these dynamic codes to personalize your email content:
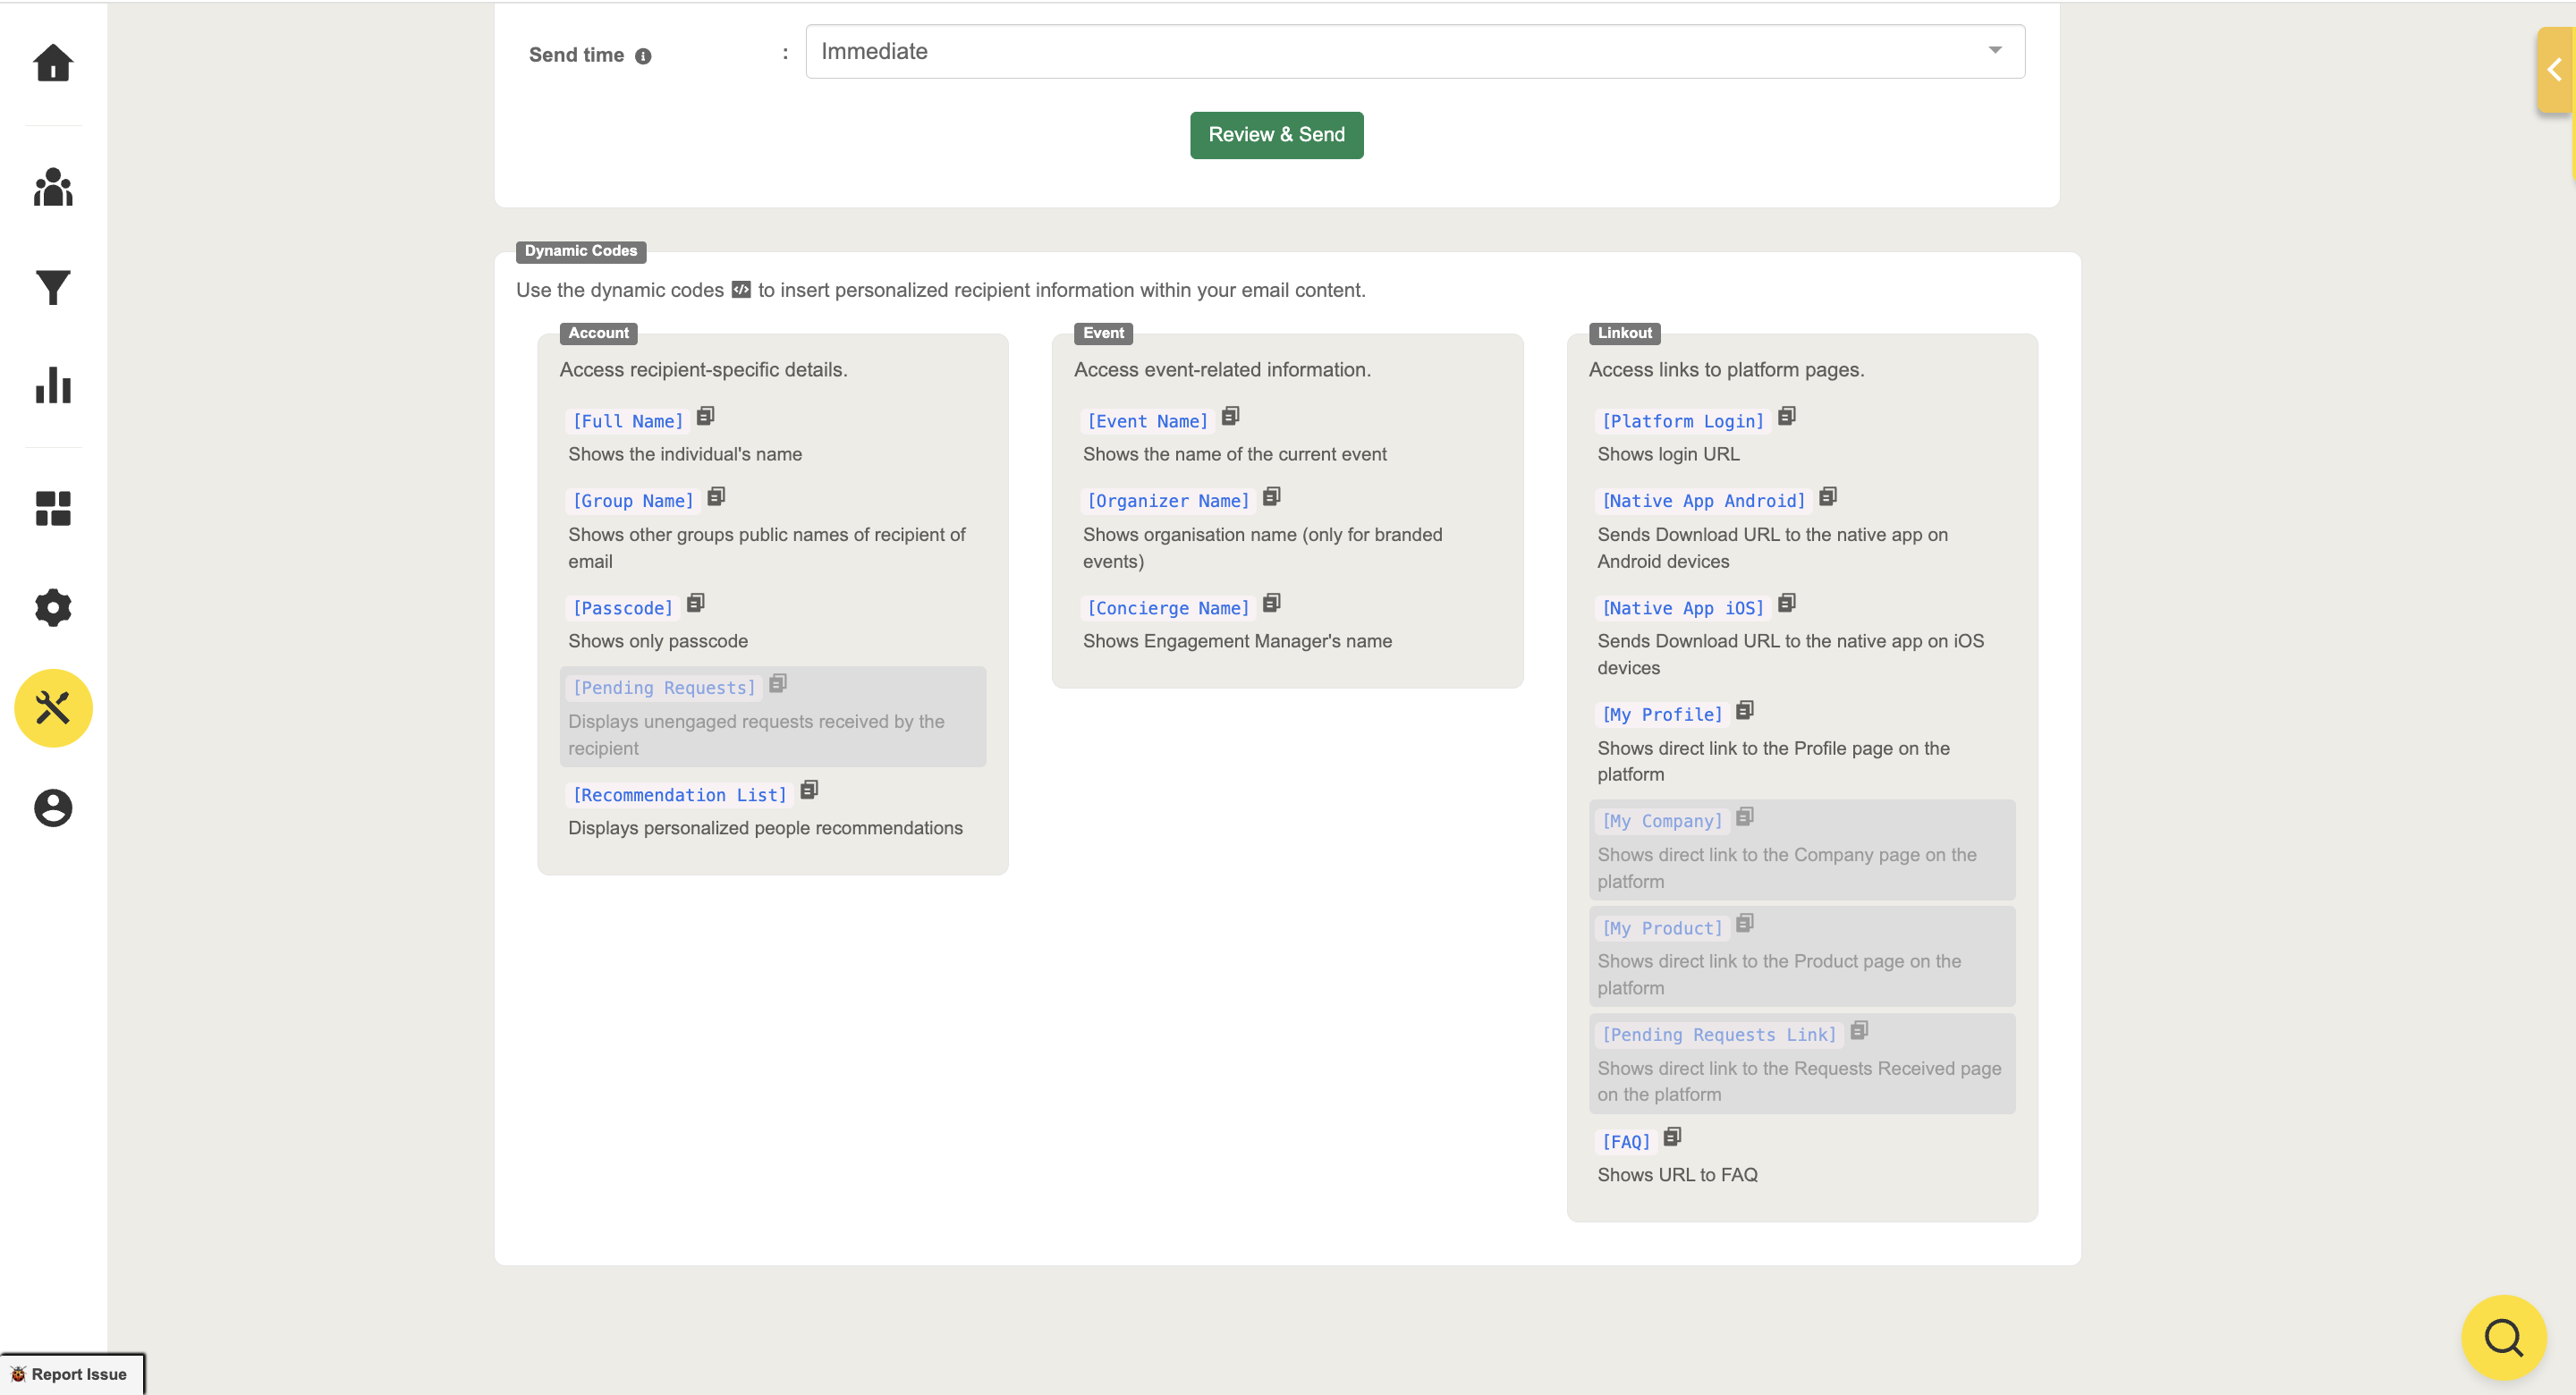
- Access recipient-specific details.
- [Full Name]: Shows the individual's name
- [Group Name]: Shows other groups public names of recipient of email
- [Passcode]: Shows only passcode
- [Pending Requests]: Displays unengaged requests received by the recipient
- [Recommendation List]: Displays personalized people recommendations
- Access event-related information.
- [Event Name]: Shows the name of the current event
- [Organizer Name]: Shows organisation name (only for branded events)
- [Concierge Name]: Shows Engagement Manager's name
- Access links to platform pages.
- [Platform Login]: Shows login URL
- [Native App Android]: Sends Download URL to the native app on Android devices
- [Native App iOS]: Sends Download URL to the native app on iOS devices
- [My Profile]: Shows direct link to the My Profile page on the platform
- [My Company]: Shows direct link to the My Company page on the platform
- [My Product]: Shows direct link to the My Product page on the platform
- [Pending Requests Link]: Shows direct link to the Requests Received page on the platform
[FAQ]: Shows URL to FAQ
Step 3: Send the Email Immediately or Schedule It
You can either:
- Send Immediately: Click "Send" to send the email instantly.
- Schedule for Later: Select "Send Later" and choose the preferred time and date for delivery.
HTML Tab
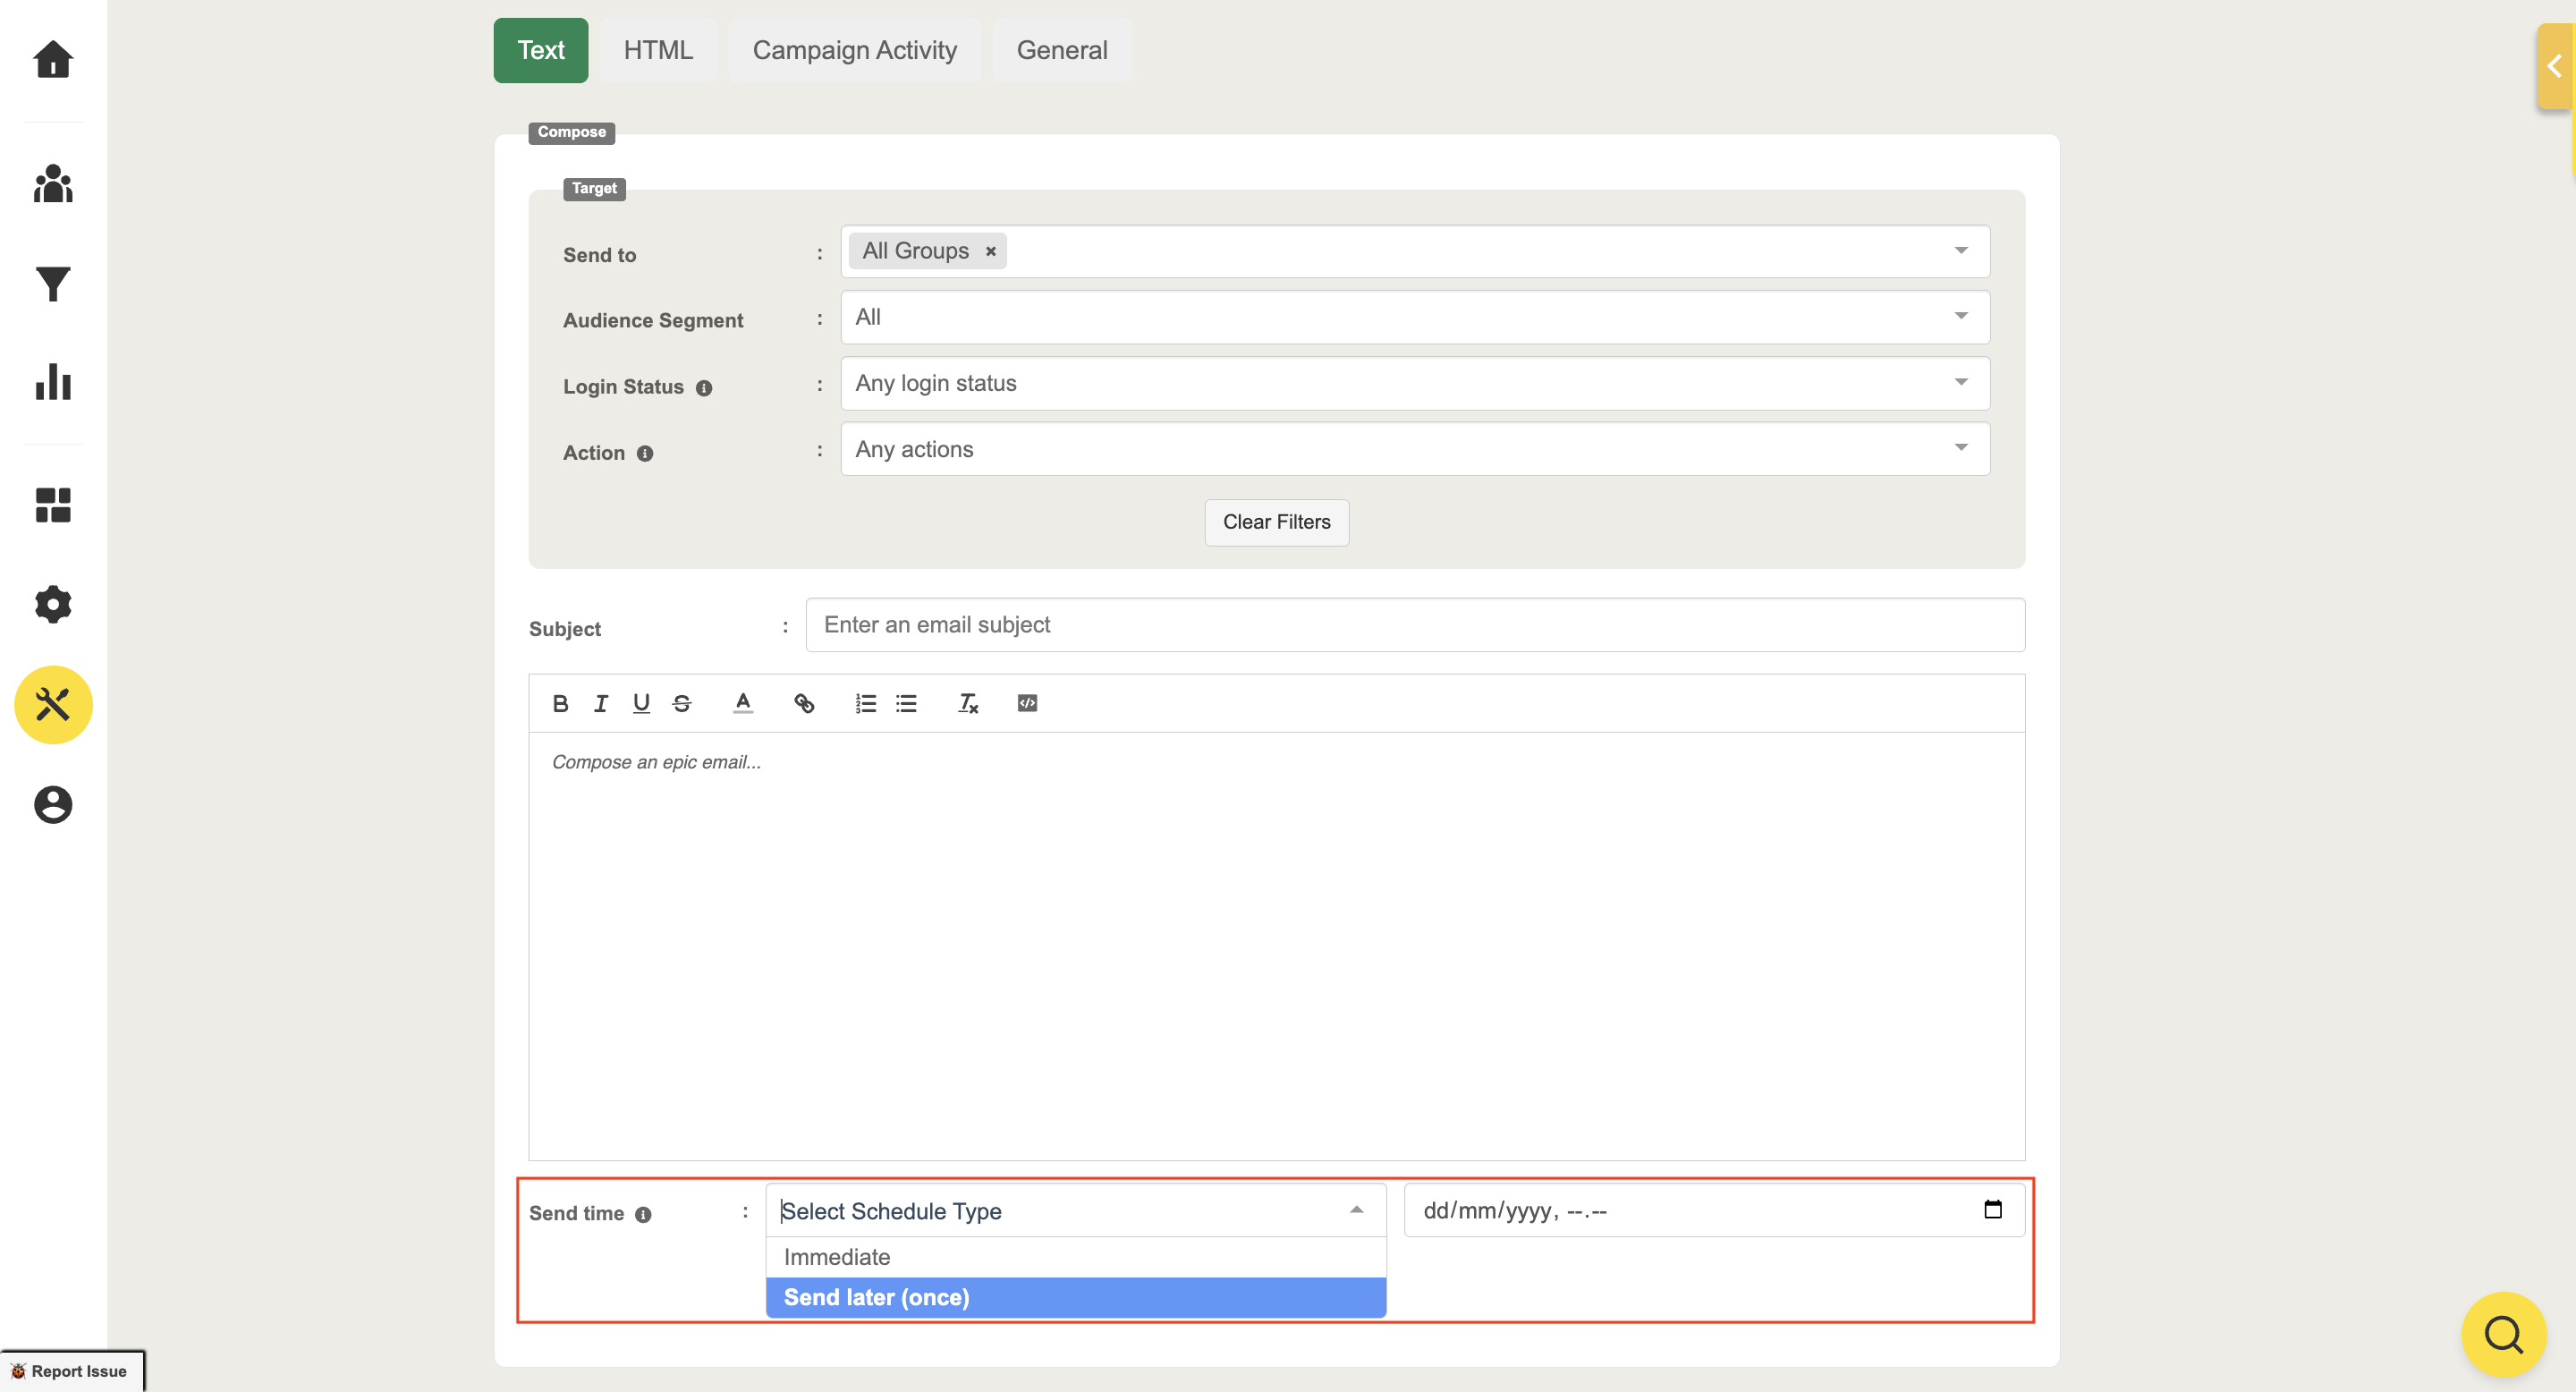
Step 1: Immediate or Scheduled Send
You can schedule an email to be sent immediately or at a later time.
- Send Later (once): Choose this option to schedule the email for later.
- Weekly Emails: For HTML emails, you can select “Send Later (weekly)” to send emails on a recurring weekly basis.

Step 2: Set Date and Time
- Choose the date and time when you want the email to be sent.
- Preview the Email: A preview will appear, allowing you to review the content.
- Confirm and Send: Once satisfied, click “Let's Send” to schedule.

Campaign Activity Tab
Stay on top of your event communications with the newly enhanced Campaign Activity Hub, a centralized space that streamlines your email workflow by combining scheduling, performance tracking, and editing tools in one place. Whether you're refining subject lines, filtering by goals, or reviewing open rates, this hub empowers you to manage campaigns more efficiently from start to finish. Learn how to access, filter, edit, and optimize your email strategy by exploring the full guide here.
Related Articles: