.png)
Email Courier: How to Configure Your Concierge Email for Jublia's Support Services
As an event organizer, ensuring a smooth experience for your attendees is crucial. That's where Jublia's Engage 360 comes in—your comprehensive support channel for all platform-related queries. Whether you're facing technical issues, need guidance on platform functionalities, or want to optimize the Engagement Hub, our 24/7 concierge team is ready to assist. With a centralized support portal and dedicated experts at your service, resolving issues and getting personalized advice has never been easier. This guide will show you how to set up and leverage our support services effectively, helping to ensure the success of your event.
Available Branding Options for You
Jublia offers a centralized help desk system with around-the-clock global coverage, manned by our expert support team to ensure all user queries are promptly responded to on time. Please see below how you can setup your concierge email:
1. Non-branded events:
This option applies when you don't have a dedicated email address for sending communications. In this case, events with non-branded domains will be automatically assigned to support@jublia.co for support inquiries. All engagement emails and replies will come from this central support address.
2. Branded events (using Jublia domain):
We'll create a dedicated email address for you using Jublia's domain. You just need to tell us what you'd like as the local part—the name before the "@" symbol.
For instance, if your event is called "Tech Expo," your custom email could be tech.expo@jublia.co.
With this setup, Jublia establishes a unique email address specifically for your event, allowing you to send communications from this custom address. Any inquiries sent to your event's email are automatically forwarded to support@jublia.co, where Jublia's support team takes care of responding to user queries on your behalf.
3. Branded events (using your own domain):
If you choose this option, it's similar to the previous one, but with one key difference: you'll need to give us a domain to send communications from. For example, you might use an address like name@event.com.
This dedicated email address will forward all messages to support@jublia.co. From there, Jublia’s support team will handle all questions and inquiries on your behalf.
How to set up the email forwarding:
If you availed for Option 3, you'll need to configure your email settings so that all messages sent to your your concierge email address are automatically forwarded to support@jublia.co. This step allows our support agents to handle the email concierge on your behalf, focusing specifically on platform-related queries.
How to Forward Emails on Outlook:
Step 1: At the top of the page, select Settings.
Step 2: Select Email > Forwarding.
Step 3: Toggle the Enable forwarding switch and enter support@jublia.co
Step 4: Click Save.
Step 5: Tick "Keep a copy of forwarded messages" so that incoming emails remain in your inbox.
Step 6: Click Save to complete the setup.

How to Forward Emails on Gmail
Step 1: Log in to your Gmail account.
Step 2: Click Settings in the top right corner and select See all settings.
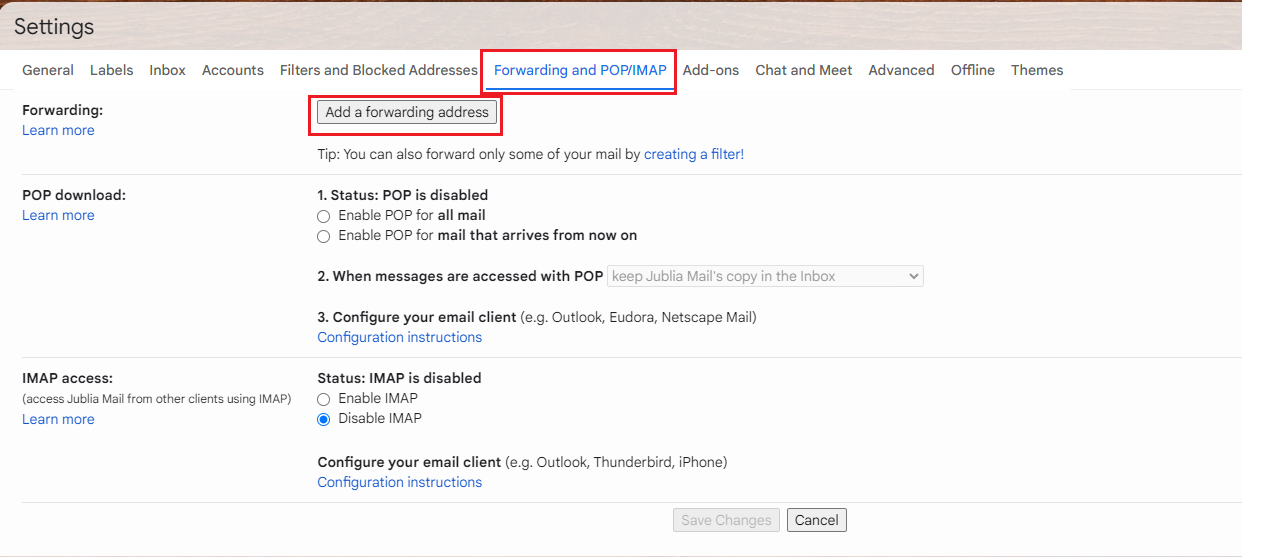
Step 3: Go to the Forwarding and POP/IMAP tab.
Step 4: On the “Forwarding” section, click Add a forwarding address.
Step 5: Enter support@jublia.co, and click Next > Proceed > OK.
Step 6: Click Save Changes.
Step 7: A verification message will be sent to support@jublia.co. Your Jublia Customer Success Manager will verify the request and notify you.
Step 8: Refresh the settings page for your Gmail account.
Step 9: Go back to the settings page for the Gmail account you want to forward messages from and refresh your browser.
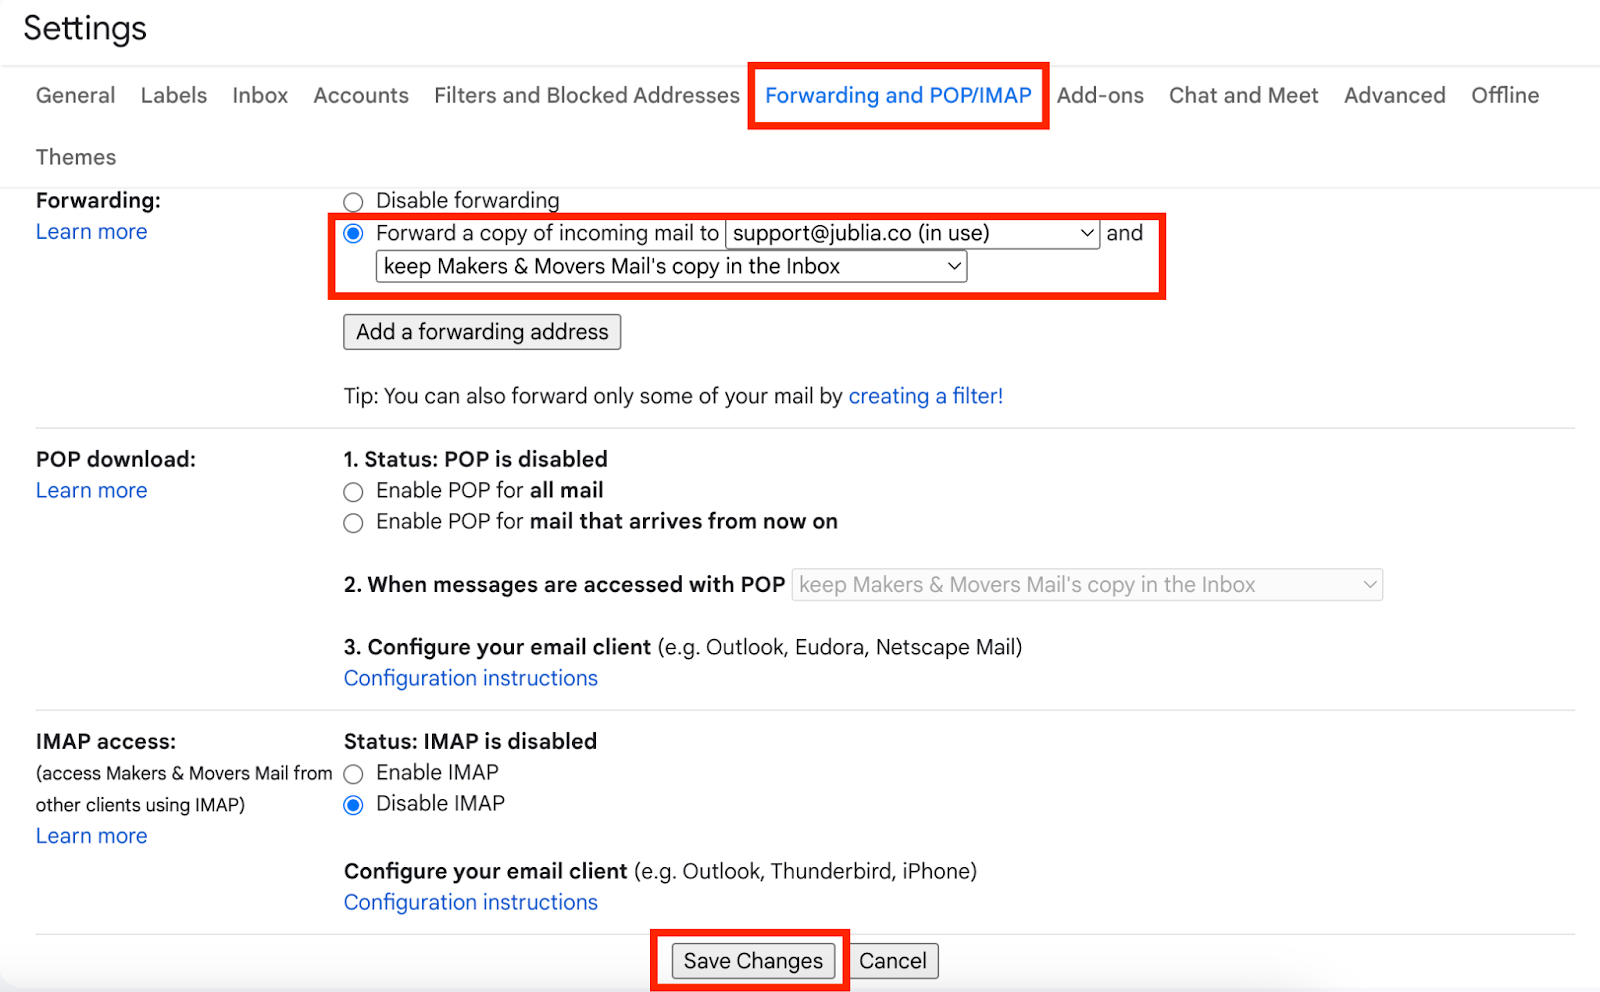
In the Forwarding and POP/IMAP tab, select Forward a copy of incoming mail to and choose what happens to Gmail’s copy of the emails. We recommend selecting "Keep Gmail's copy in the inbox."
Step 10: At the bottom, click Save Changes
Step 9: Go back to the settings page for the Gmail account you want to forward messages from and refresh your browser.
Step 10: Click the Forwarding and POP/IMAP tab.
Step 11: In the "Forwarding" section, select Forward a copy of incoming mail to.
Step 12: Choose what you want to happen with the Gmail copy of your emails. We recommend selecting "keep Gmail's copy in the inbox".
Step 13: At the bottom of the page, click Save Changes.
If you want to read related information, here are some suggested reads: